How to replace the drain pump on a front-load washer
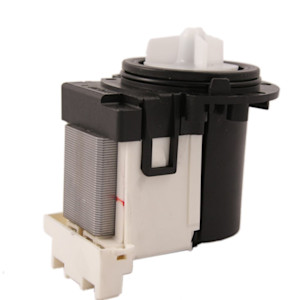
This DIY repair guide explains how to replace a front-load washer drain pump. If the pump motor fails, it won't drain water from the washing machine. Install a manufacturer-approved washer part if the pump motor doesn't run or if the pump's been damaged by a foreign object such as a coin.
Use the steps in this guide to replace the drain pump on Kenmore 796-series and LG front-load washers. Although the repair guide shows how to replace a Kenmore front-load washer drain pump, you also can use the same basic procedure to replace the drain pump on Samsung, GE, Maytag, Amana and Whirlpool front-load washers.
We also have instructions for replacing the drain pump on a top-load washer.
This video shows how to replace the drain pump on a front-load washer.
Instructions
- 01.
Shut off the electricity
Unplug the power cord from the wall outlet. Drain water from the washer tub using a wet/dry shop vacuum.
Wear work gloves to protect your hands.
Have someone help you move the washer away from the wall.
- 02.
Remove the top panel
Remove the 2 screws on the back of the washer that hold the top panel.
Pull the top panel toward the rear of the washer and lift it up and off.

PHOTO: Remove the top panel screws at the back of the washer.
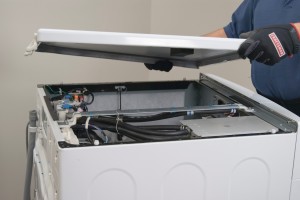
PHOTO: Remove the top panel.
- 03.
Remove the control panel
Remove the screw on the left back of the control panel.
Pull the dispenser drawer forward until it stops. Release the locking tab at the back of the dispenser drawer and then pull it completely out of the dispenser housing.
Remove the screws on each side of the dispenser housing.
Unplug the wire harness connections for the control panel by pressing on the release tabs and sliding the connectors apart.
Stand in front of the washer and lift up on the control panel to release the top.
Pull the control panel off the washer.

PHOTO: Remove the screw on the left back side of the control panel.
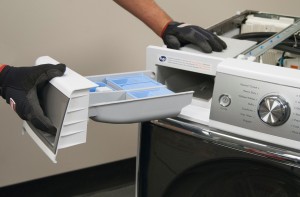
PHOTO: Remove the dispenser drawer.
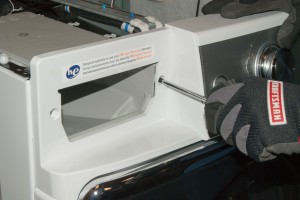
PHOTO: Remove the screws on the dispenser housing.
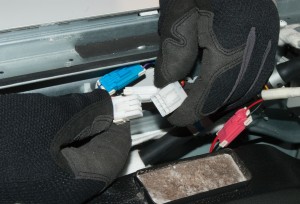
PHOTO: Unplug the control panel wires.

PHOTO: Remove the control panel.
- 04.
Remove the front panel
Open the drain pump filter cover at the bottom of the washer front panel.
Remove the screw that secures the plastic pump housing to the frame of the washer.
Remove the plastic pump housing.
Remove the mounting screw from bottom of the front panel.
Open the washer door.
Use the outer spring pliers to expand the spring clamp and remove it from the door boot.
Release the rubber door boot from the lip around the opening to the washer tub on the front panel.
Remove the 7 screws from the top of the front panel.
Close the washer door.
Tip the top of the front panel forward and disconnect the wire harness from the door lock/switch assembly. Pull the front panel off the washer.
Tip: Instead of the outer spring pliers, you can use a slot screwdriver to pry the spring clamp off the door boot. Don't damage the rubber door boot with the screwdriver.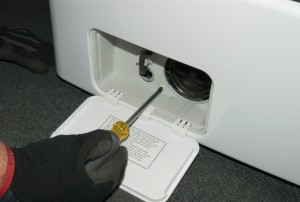
PHOTO: Remove the pump housing screws.
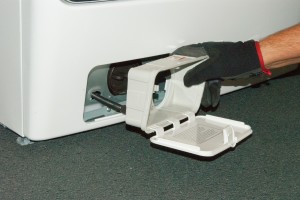
PHOTO: Remove the pump housing.
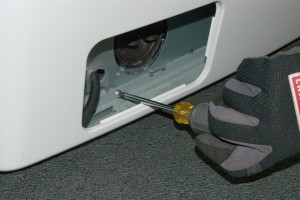
PHOTO: Remove the mounting screw from the bottom of the front panel.
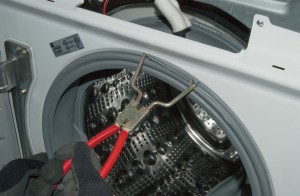
PHOTO: Remove the spring clamp.

PHOTO: Release the door boot.

PHOTO: Remove the screws from the top of the front panel.

PHOTO: Unplug the door lock switch wire harness.
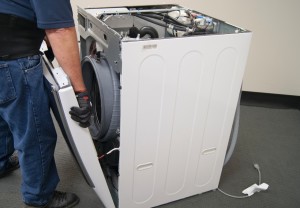
PHOTO: Remove the front panel from the washer.
- 05.
Remove the drain pump hoses
Place a shallow drain pan in front of the washer and then remove the plug from the small drain hose on the pump body.
Drain any water remaining in the pump body and washer tub.
Reinstall the plug and set aside the drain pan.
Put a towel under the pump body hoses to catch leaks.
Use pliers to release the spring clamp and then pull the drain hose off the pump body.
Repeat to pull the recirculation hoses off the pump body.
Release the spring clamp and remove the tub-to-pump hose from the pump body.
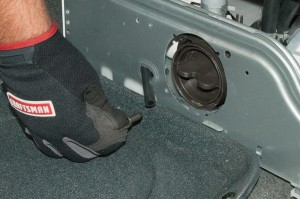
PHOTO: Drain water from the drain pump.
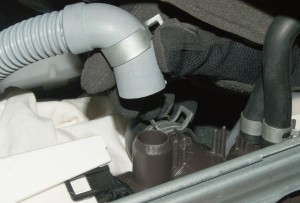
PHOTO: Pull the drain hose off the pump body.
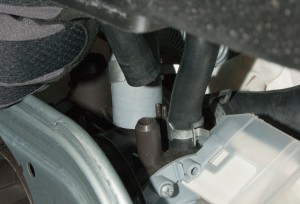
PHOTO: Pull the recirculation hoses off the pump body.

PHOTO: Pull the tub-to-pump hose off the pump body.
- 06.
Remove the drain pump
Take a photo of how the wires connect to the drain pump and recirculation pump.
Pull the wire harness connections off the drain pump and recirculation pump.
Release the wires from the tiebacks on the drain pump.
Remove the bolts that secure the drain pump to the washer base.
Remove the pump body and set it on a work surface.
Remove the towel from the washer. Remove the drain pump mounting screws and pull the drain pump out of the pump body.
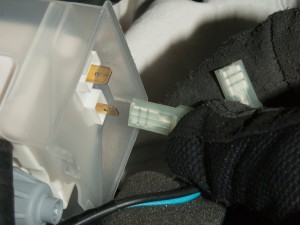
PHOTO: Disconnect the drain pump wires.
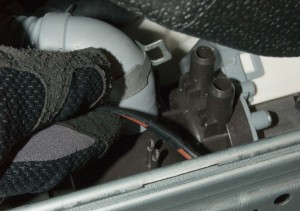
PHOTO: Release the wires from the tiebacks.

PHOTO: Remove the pump body mounting bolts.
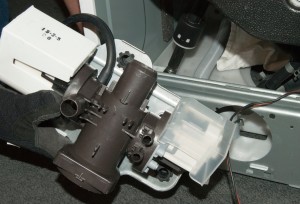
PHOTO: Pull out the pump body.

PHOTO: Remove the drain pump mounting screws.

PHOTO: Remove the drain pump from the pump body.
- 07.
Install the new drain pump
Insert the new drain pump into the pump body and reinstall the mounting screws.
Reinstall the pump body in the washer base and secure it with the mounting bolts.
Using your photo as a guide, reconnect the wires to the new drain pump and the recirculation pump.
Route the wires through the tiebacks on the drain pump.
Reconnect the tub-to-pump hose and secure it with the spring clamp.
Reconnect the recirculation hoses on the pump body and secure them with the hose clamps. Reconnect the drain hose to the pump body and secure it with the hose clamp.
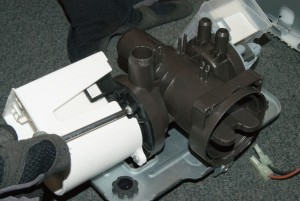
PHOTO: Install the new drain pump into the pump body.

PHOTO: Reinstall the pump body in the washer base.
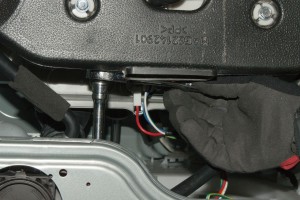
PHOTO: Reinstall the pump body mounting bolts.

PHOTO: Reconnect the pump wires.
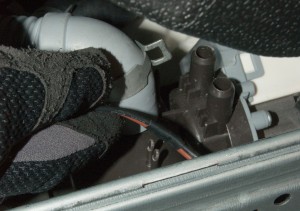
PHOTO: Route the wires through the tiebacks.
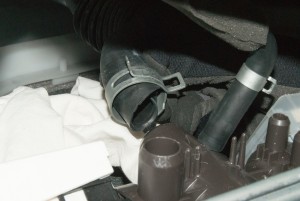
PHOTO: Reconnect the tub-to-pump hose.
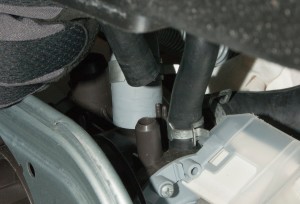
PHOTO: Reconnect the recirculation hoses.

PHOTO: Reconnect the drain hose to the pump body.
- 08.
Reinstall the front washer panel
Position the front panel in front of the cabinet and reconnect the door switch wiring harness.
Lift the front panel onto the frame and line up the mounting screw holes at the top of the front panel.
Insert the 7 mounting screws at the top of the front panel and tighten them firmly.
Open the washer door. Position the door boot properly around the lip of the opening in the front door panel.
Secure the door boot with the spring clamp.
Note: If you don't have outer spring pliers, work the spring clamp onto the lip of the door boot by hand starting with the spring at the 6 o'clock position. When the spring is most of the way around the lip, attach vice grip pliers to the clamp on one side of the spring and pull the spring straight sideways to expand the spring. Work the clamp the rest of the way onto the lip.
Insert the screw into the bottom base of the washer in the opening for the pump housing and tighten.
Push the drain pump filter housing to the front panel recess at the bottom of the washer.
Reinstall the mounting screws and tighten it firmly.
Close the drain pump filter housing door.
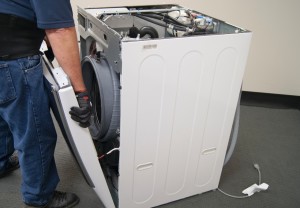
PHOTO: Position the front panel in front of the cabinet.

PHOTO: Plug in the door lock switch wire harness.

PHOTO: Reinstall the mounting screws in the top of the front panel.

PHOTO: Reinstall the door boot.

PHOTO: Reinstall the spring clamp.

PHOTO: Reinstall the screw at the base of the washer in the pump housing opening.
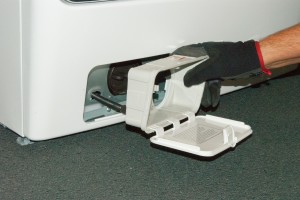
PHOTO: Reinstall the pump housing.
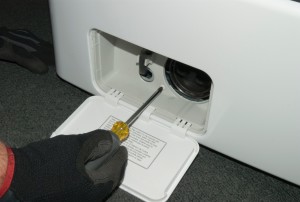
PHOTO: Reinstall the pump housing screws.
- 10.
Reinstall the control panel
Position the control panel on the top of the front panel.
Reinstall the screws in the dispenser housing.
Reinstall the screw on the back right side of the control panel. Plug in the wire harness connections for the control panel.
Push the detergent dispenser back into the drawer housing.
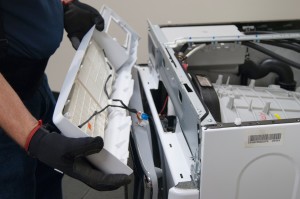
PHOTO: Reinstall the control panel.
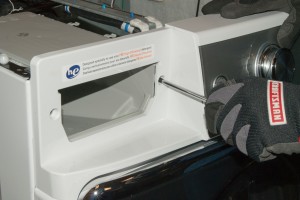
PHOTO: Reinstall the dispenser housing screws.

PHOTO: Reinstall the control panel rear screw.

PHOTO: Plug in the control panel wire harness connections to the control board.
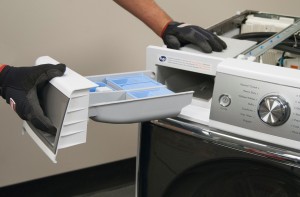
PHOTO: Reinstall the dispenser drawer.
- 11.
Reinstall the top panel
Push the panel down and forward to seat it on the washer frame.
Reinstall the screws to secure the back panel. Avoid overtightening.
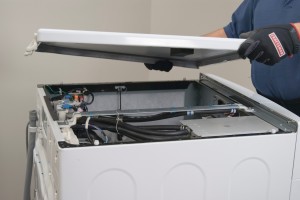
PHOTO: Reinstall the top panel.

PHOTO: Reinstall the top panel rear bracket screws.
- 12.
Restore the power
Plug the washer into the electrical outlet.
Return the washer to its original location.
Most common symptoms to help you fix your washers
Choose a symptom to see related washer repairs.
Main causes: unbalanced load, loose spanner nut, worn drive block, broken shock absorber or suspension spring, debris in…
Main causes: bad lid switch or door lock, bad timer or electronic control board, wiring failure, bad water inlet valve a…
Main causes: clogged drain hose, house drain clogged, bad drain pump, water-level pressure switch failure, bad control b…
Main causes: leaky water inlet valve, faulty water-level pressure switch, bad electronic control board…
Main causes: water heater failure, bad water temperature switch, faulty control board, bad water valve, faulty water tem…
Main causes: lack of electrical power, wiring failure, bad power cord, electronic control board failure, bad user interf…
Main causes: no water supply, bad water valves, water-level pressure switch failure, control system failure, bad door lo…
Main causes: worn agitator dogs, bad clutch, broken motor coupler, shifter assembly failure, broken door lock, suspensio…
Main causes: broken lid switch or lid lock, bad pressure switch, broken shifter assembly, faulty control system…
Repair guides for front-load washers
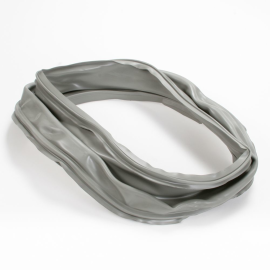
How to replace the door boot on a front-load washer
If your washer leaks from under the door panel, replace the rubber door boot if it's torn.…
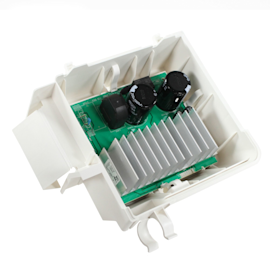
How to replace a motor control board on a front-load washer
The motor control board makes sure the motor spins in the right direction and at the right speed. You can install a new …
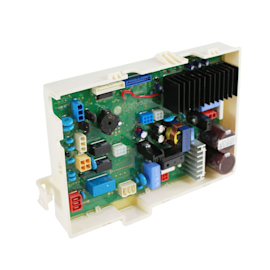
How to replace the machine control board in a front-load washer
If the machine control board is completely dead or won't activate the washer components properly, replace it by followin…
Effective articles & videos to help repair your washers
Use the advice and tips in these articles and videos to get the most out of your washer.
Find tips for using your washing machine efficiently to save energy and help reduce utility bills.…

Learn about all the convenient features on our Sears PartsDirect website that make your parts purchases easier.…

Get answers to frequently asked questions about Sears and Sears PartsDirect.…
