Kenmore
Tools & Attachment

Model # 11656212606 Official Kenmore powermate vacuum attachment

Here are the diagrams and repair parts for Official Kenmore 11656212606 powermate vacuum attachment, as well as links to manuals and error code tables, if available.

There are a couple of ways to find the part or diagram you need:

  • Click a diagram to see the parts shown on that diagram.
  • In the search box below, enter all or part of the part number or the part’s name.

Not all parts are shown on the diagrams—those parts are labeled NI, for “not illustrated”.

We encourage you to save the model to your profile, so it’s easy to access parts and manuals for your appliance whenever you log in.

For DIY troubleshooting advice and repair guides, visit our repair help section.

Model diagram and schematic

SEARCH WITHIN THIS MODEL

?

This is the number corresponding to the part on the diagram / schematic

Search
ALL PARTS
Showing 10 of 39 parts  |

Vacuum Foam Filter 4370713
#8

Power mate diagram

Vacuum foam filter

Part #4370713

The manufacturer no longer makes this part, and there's no substitute part
Vacuum Powermate Wheel 4370724
#43

Power mate diagram

Vacuum powermate wheel

Part #4370724

The manufacturer no longer makes this part, and there's no substitute part

Wiring Label LITKS747155

#NI01

All parts diagram

Wiring label

Part #LITKS747155

The manufacturer no longer makes this part, and there's no substitute part
Block 8191506
#25

Power mate diagram

Block

Part #8191506

The manufacturer no longer makes this part, and there's no substitute part
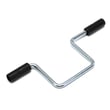
Vacuum Powermate Front Axle KS744029
#54

Power mate diagram

Vacuum powermate front axle

Part #KS744029

The manufacturer no longer makes this part, and there's no substitute part

Vacuum Powermate Swivel Seal KS742019
#22

Power mate diagram

Vacuum powermate swivel seal

Part #KS742019

The manufacturer no longer makes this part, and there's no substitute part
Vacuum Handle Release Pedal KC47AGJ3V06
#42

Power mate diagram

Vacuum handle release pedal

Part #KC47AGJ3V06

The manufacturer no longer makes this part, and there's no substitute part

Indicator Cam KS747291
#24

Power mate diagram

Indicator cam

Part #KS747291

The manufacturer no longer makes this part, and there's no substitute part

Vacuum Beater Bar Belt 8175123
#52

Power mate diagram

Vacuum beater bar belt

Part #8175123

The manufacturer no longer makes this part, and there's no substitute part

Twist-on Wire Connector 4368522
#45

Power mate diagram

Twist-on wire connector

Part #4368522

The manufacturer no longer makes this part, and there's no substitute part

Most common symptoms to help you fix your ranges

Choose a symptom to see related range repairs.

Main causes: broken oven door lock assembly, wiring failure, electronic control board problem...

Main causes: broken broiler element, weak or broken broil burner igniter, control system failure, faulty temperature sen...

Main causes: power supply problem, control thermostat or electronic control board failure, broken element, bad burner ig...

Main causes: bad bake element, broken burner igniter, control system failure, blown thermal fuse, faulty temperature sen...

Main causes: food splatters, spilling food on the oven door, allowing liquid to drip through oven door vent when cleanin...

Main causes: faulty temperature sensor, electronic control board problem, control thermostat failure, weak burner ignite...

Main causes: power supply failure, blown thermal fuse, bad relay control board, damaged terminal block, wiring failure...

Most common repair guides to help fix your ranges

These step-by-step repair guides will help you safely fix what’s broken on your range.

How to replace a range oven door switch

How to replace a range oven door switch

The oven door switch detects whether the oven door is closed and helps control the oven light. Replace the switch if it ...

Repair difficulty
Time required
30 minutes or less
How to replace a range oven door lock assembly

How to replace a range oven door lock assembly

Oven door not locking? You can replace the lock assembly in less than 30 minutes. Here's how....

Repair difficulty
Time required
15 minutes or less

Effective articles & videos to help repair your ranges

Use the advice and tips in these articles and videos to get the most out of your range.

How to clean and maintain your stove

How to clean and maintain your stove

Learn how to clean and maintain your stove to keep it in top shape....

How to enjoy all the online benefits we offer on our Sears PartsDirect website

How to enjoy all the online benefits we offer on our Sears PartsDirect website

Learn about all the convenient features on our Sears PartsDirect website that make your parts purchases easier....

Top questions about Sears and Sears PartsDirect

Top questions about Sears and Sears PartsDirect

Get answers to frequently asked questions about Sears and Sears PartsDirect....