CONFIRM THE PART FITS
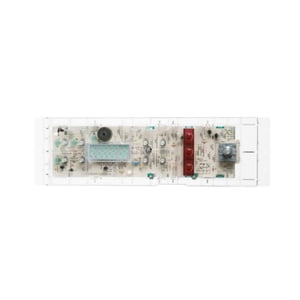
Range Oven Control Board (replaces WB27X10216) WB27X10311
Part #WB27X10311
Part Information
This oven control board (part number WB27X10311) is for ranges.
Oven control board WB27X10311 monitors the temperature and controls the oven heat.
Unplug the range or shut off the house circuit breaker for the range before servicing the unit. Wear work gloves to protect your hands.
Frequently Used Together
- $19.06
- $7.38 |12% OFF Phone Price : $8.38
- $8.59 |10% OFF Phone Price : $9.59
- $22.26
- $10.33 |16% OFF Phone Price : $12.33
- $13.40 |13% OFF Phone Price : $15.40
- $17.03
- $18.63 |10% OFF Phone Price : $20.63
Top models using the same part
| Model Name | Model Number | Diagram Name |
|---|---|---|
| Model #JBP75AY4 GE electric range | JBP75AY4 | |
| Model #JBP78AY5 GE electric range | JBP78AY5 | |
| Model #JBP76WIY5 GE electric range | JBP76WIY5 | |
| Model #JBP75WY4 GE electric range | JBP75WY4 | |
| Model #JBP78BY5 GE electric range | JBP78BY5 | |
| Model #JBP76WIY4 GE electric range | JBP76WIY4 | |
| Model #JBP78WY5 GE electric range | JBP78WY5 | |
| Model #JBP75AY5 GE electric range | JBP75AY5 | |
| Model #JBP75AY3 GE electric range | JBP75AY3 | |
| Model #JBP75WY5 GE electric range | JBP75WY5 |
Reviews
Easy to install
It is a revised part from the original but was still easy to replace with included wiring instruction sheet. You do need to remove the plastic terminal body from the bake element wire to allow it to plug into the new circuit board, I did wrap the terminal with electrical tape to provide some protection after body removal. You also need to transfer the control button plastic membrane on the face of the control board to the new board. I used a heat gun on low heat and a putty knife to CAREFULLY release the membrane from the adhesive, do not let it get to hot, it will cause the membrane to warp or melt. After removal I cleaned off the remaining adhesive from the membrane and applied new double sided tape and I aligned attached to new board using the raised bosses on the board as a locator guide. Transferring the membrane was the most time consuming part of the repair.
Vern, Livonia, MI.
Did you find this review helpful?
- Ease of Installation
- Very Easy
- Duration of Installation
- 30 minutes - 1 hour
Yes, I would recommend this to a friend
Straightforward great instructions
Great instructions, easy job, would use sears again!
Dave L, Waverly ohio
Did you find this review helpful?
- Ease of Installation
- Very Easy
- Duration of Installation
- Less than 30 minutes
Yes, I would recommend this to a friend
Simple to install
Easy installation, instructions didn't match part exactly but with only 4 wires it wasn't a problem.
Jake, Minnesota
Did you find this review helpful?
- Ease of Installation
- Very Easy
- Duration of Installation
- 30 minutes - 1 hour
Yes, I would recommend this to a friend
