How to change the oil in a riding lawn mower video
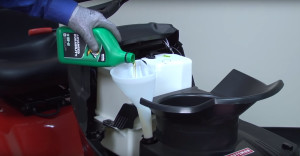

You should change the oil in your riding lawn mower at least once a year to help the engine run smoother and last longer. This video walks you through how to drain the old oil and replace it with new oil.
For additional repair help, including common symptoms and troubleshooting tips, step-by-step riding lawn mower and tractor repair guides and articles, check out our repair help section. In addition, find the riding mower parts you need to fix your mower.
Hi, Wayne here from Sears PartsDirect. Today we're going to change the engine oil in a riding mower. Engine oil helps your riding mower engine run smoother and last longer by lubricating engine parts to reduce friction. Over time, engine oil gets dirty with particles that can abrade engine parts. Do an oil change as often as recommended in your owner’s manual, or at least once a year. Supplies You May Need
Drain pan
Strap wrench
Work gloves
The first step is to gather the supplies for the oil change. You need engine oil—use the type and amount recommended in your owner's manual. For this riding mower, we'll use 10W-30, which lubricates well at typical mowing-season temperatures.
If you lost the oil drain tube that came with your mower (like I did), you’ll need a new one. This little hose helps you drain the oil directly into the drain pan without making a mess. Of course, you need a drain pan or container to catch the old oil. Use a container with a spout or a cover so you can carry the old oil to a collection facility after the oil change.
This mower uses an oil filter, so you'll need one of those for this oil change, too. Also grab a strap wrench to loosen and tighten the oil filter.
How to Change the Oil
Once you gather the supplies, run the mower in a well-ventilated area. This will warm the oil so it drains easily. Park the mower on a level surface. Set the parking brake and remove the ignition key. Lift the hood and disconnect the spark plug wire (or wires if your engine has more than one cylinder).
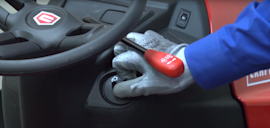
Now we're ready to get started. To give you a better view, we’ve removed the hood. Remove the fastener from the lower right dash cover. Carefully slide the dash cover up slightly to release the locking tabs and remove the cover. Remove the oil drain valve cap and install the oil drain tube. Put an oil pan under the drain tube to catch the draining oil.
Push in and turn the drain valve counterclockwise to unlock it and then pull the drain valve outward to open. Remove the oil dipstick, taking care to keep debris out of the dipstick opening. Let the engine oil drain until it stops completely. Push the drain valve in and turn clockwise until the pin locks. Remove the oil drain tube and reinstall the drain valve cap. Reinstall the dash cover and secure it with the fastener.
How to Replace the Oil Filter
Now that we've drained the oil, we'll replace the oil filter. Remove the fastener from the lower left dash cover and pull off the cover to access the oil filter. Move the oil drain pan under the oil filter to catch drips from the filter.
Use a strap wrench to turn the oil filter counterclockwise to unlock it. Remove the filter and wipe up any oil spills off the mower frame. Lubricate the new oil filter's seal with a light coat of new oil. Position the new filter on the engine and turn the filter clockwise to lock it in place. Pull the oil drain pan from under the mower. Reinstall the dash cover and secure it with the fastener.
Adding New Oil to the Engine
The final step is to add the new oil. Because some oil might remain in the mower after you drain it, you might end up adding less than the amount specified in the owner’s manual. To avoid overfilling, follow these steps.
Pour clean oil through the dipstick tube, stopping several ounces before the full amount specified in the owner’s manual.
Wait a minute for the oil to settle in the engine sump.
To check the oil level, wipe the dipstick with a shop rag and push the dipstick all the way into the dipstick opening and lock it.
Then unlock it and pull it out. If the oil doesn’t reach the top of the full mark on the dipstick, add a little more oil, wait a minute and check again.
Repeat until oil reaches the top of the full mark.
Reinsert the dipstick.
Re-Check the Oil Level
Reconnect the spark plug wire and lower the mower hood. Now, we'll run the engine for a few minutes to move the oil through the engine. In a well-ventilated area, we'll run the engine for a few minutes to move the oil through the engine, and then shut it off and check the oil level. Allow a minute for the oil to settle in the engine sump. Lift the mower hood and check the oil level one more time.
Add oil if needed to hit the full mark on the dipstick. Now you can dust off your hands and pat yourself on the back for taking such good care of your engine. The engine will pay you back with years of efficient and dependable service.
I hope this video helps you out today. You can find links to the products we talked about in the video description. Check out our other videos here on the Sears Parts Direct YouTube channel. Subscribe, and we’ll let you know when we post new ones.
Most common symptoms to help you fix your riding mowers & tractors
Choose a symptom to see related riding mower and lawn tractor repairs.
Main causes: faulty battery, bad alternator…
Main causes: damaged cutting blade, worn deck pulley, damaged mandrel pulley, loose fasteners on mower deck components…
Main causes: damaged tie rods, bent or worn wheel spindle, worn front axle, damaged sector gear assembly…
Main causes: worn or broken blade belt, broken belt idler pulley, blade clutch cable failure, bad PTO switch, damaged ma…
Main causes: punctured tire or inner tube, leaky valve stem, damaged wheel rim…
Main causes: engine overfilled with oil, leaky head gasket or sump gasket, damaged carburetor seals, cracked fuel pump, …
Main causes: clogged carburetor, damaged flywheel key, dirty spark plug, stale fuel, improper valve lash, engine needs a…
Main causes: shift lever needs adjustment, neutral control needs adjustment…
Main causes: worn or broken ground drive belt, bad seat switch, transaxle freewheel control engaged, transaxle failure, …
Most common repair guides to help fix your riding mowers & tractors
These step-by-step repair guides will help you safely fix what’s broken on your riding mower or lawn tractor.
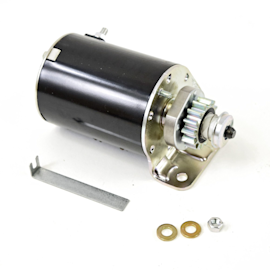
How to replace the starter motor on a riding lawn mower
If you hear the solenoid click but don’t hear the starter motor spin when you turn the key, follow these steps to replac…
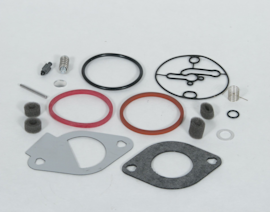
How to rebuild a riding lawn mower carburetor
Get your sputtering carburetor running smoothly in 60 minutes.…
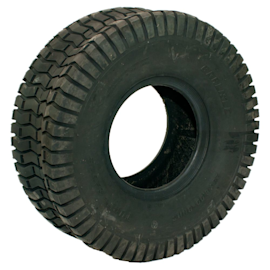
How to replace a riding lawn mower rear tire
Your mower can’t run on a damaged rear tire. Here’s how to install a new one.…
Effective articles & videos to help repair your riding mowers & tractors
Use the advice and tips in these articles and videos to get the most out of your riding mower or lawn tractor.

Learn about all the convenient features on our Sears PartsDirect website that make your parts purchases easier.…

Get answers to frequently asked questions about Sears and Sears PartsDirect.…
Check the starter solenoid, starter motor, wiring, battery and engine.…