How to rebuild a riding lawn mower carburetor
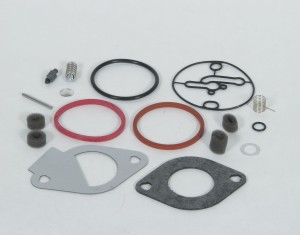
This DIY riding mower repair guide gives step-by-step instructions for rebuilding the carburetor on a riding lawn mower. The carburetor blends air and fuel to produce a combustible mixture for the engine cylinder. If the carburetor runs rough because it's clogged or dirty, you can clean and rebuild it, using a manufacturer-approved replacement kit. The kit includes gaskets, seals, a hinge pin and other components that you might need to replace to fix riding mower carburetor problems. You probably won't use every part in the carburetor kit. In this repair, you use the fuel bowl gasket, mounting gasket and hinge pin to fix Craftsman riding mower carburetor problems.
Use these steps to rebuild the carburetor on common Briggs & Stratton engines that power Craftsman, Troybilt, Husqvarna, MTD, Poulan, Toro, Murray, Snapper, Yard-Man and John Deere riding mowers and lawn tractors.
If the riding mower carburetor is too corroded, dirty or damaged to rebuild, you can replace it with a new one. See How to Replace a Carburetor in a Riding Lawn Mower.
This video explains how to rebuild the carburetor in a riding lawn mower.
Instructions
- 01.
Disconnect the battery
Park the tractor on a level surface in a well-ventilated area and set the parking brake.
Turn the ignition switch off and remove the key.
Let the engine cool.
Wear work gloves to protect your hands and safety goggles to protect your eyes.
Lift the seat.
Remove the bolt connecting the negative cable to the battery and tuck the cable away from the battery so it doesn't touch the battery post.
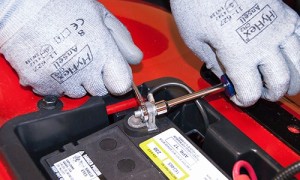
PHOTO: Disconnect the negative battery cable.
- 02.
Remove the engine blower housing
Lift the tractor hood.
Remove the air duct mounting screws and pull off the air duct.
Turn each air filter cover retaining knob counterclockwise and pull off the air filter cover.
Remove the air filter.
Remove the air filter housing screw.
Remove the front and rear blower housing mounting bolts and lift off the blower housing.
Tip: Remove the hood to gain more room to work.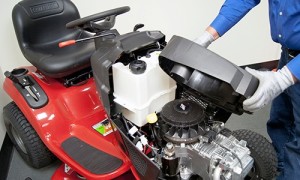
PHOTO: Lift off the blower housing.
- 03.
Disconnect the fuel line
Clamp off the fuel line with hose pinch-off pliers.
Place a shop rag under the carburetor end of the fuel line to catch drips.
Release the clamp that attaches the fuel line to the carburetor and pull the fuel line off the carburetor.
Wipe up any spilled fuel.
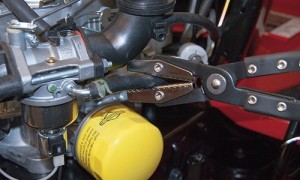
PHOTO: Clamp off the fuel line with hose pinch-off pliers.
- 04.
Remove the carburetor
Remove the air intake mounting nuts.
Detach the breather tube and remove the air intake.
Disconnect the wire from the fuel solenoid.
Take a digital photograph of the carburetor linkage connections to document their location for reassembly.
Remove the carburetor mounting studs.
Disconnect the throttle rod and the throttle spring.
Disconnect the choke rod.
Pull off the carburetor and place it on a clean work surface in a well-ventilated area.
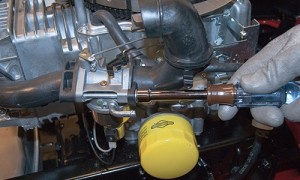
PHOTO: Remove the carburetor.
- 05.
Remove components
Unthread the solenoid valve and remove it.
Remove the float bowl, draining fuel from the float bowl into the fuel-safe container.
Punch out the float hinge pin.
Remove the float and needle valve.
Remove the float bowl gasket, engine intake gasket and air intake O-ring.
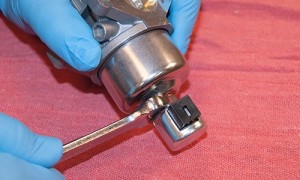
PHOTO: Remove the fuel solenoid valve.
- 06.
Clean the carburetor
Clean the float bowl and gasket seating surfaces using carburetor cleaner and a shop rag.
Use a paper clip to remove any float bowl gasket and air intake O-ring residue.
Use carburetor cleaner and a paper clip to clean all the holes in the carburetor, paying close attention to the main and idle jets.
Let the carburetor dry completely before reassembling it (at least 10 minutes).
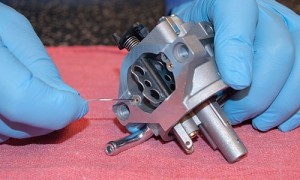
PHOTO: Clean the carburetor.
- 07.
Reassemble the carburetor
Lubricate the new float bowl gasket with a small amount of petroleum jelly.
Install the new float bowl gasket.
Install the new needle valve.
Reattach the float with the new hinge pin.
Attach the float bowl with the solenoid valve.
Install the new air intake O-ring.
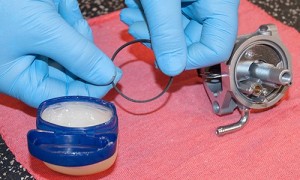
PHOTO: Lubricate the bowl gasket.
- 08.
Install the rebuilt carburetor
Position the rebuilt carburetor near the engine and reconnect the choke rod.
Connect the throttle rod and spring.
Install the new intake gasket on the engine.
Attach the carburetor on the engine with the mounting studs. Tighten the studs firmly.
Connect the fuel solenoid wire.
Attach the breather tube to the air intake and connect the air intake to the carburetor.
Install the air intake mounting nuts.
Reattach the fuel line to the carburetor with the hose clamp.
Release and remove the hose clamp pliers from the fuel line.
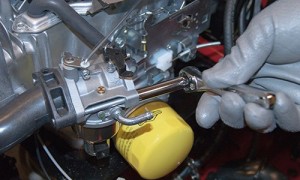
PHOTO: Install the rebuilt carburetor.
- 09.
Connect the fuel line
Attach the fuel line to the carburetor.
Remove the hose pinch-off pliers from the fuel line.
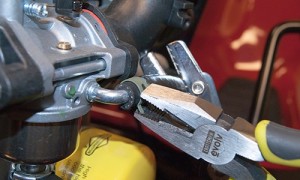
PHOTO: Connect the fuel line.
- 10.
Reinstall the engine blower housing
Position the blower housing on the engine and align the air diverter in the housing.
Install the blower housing mounting bolts.
Install the air filter housing screw.
Install the air filter and air filter cover.
Install the air duct and attach it with the mounting screws.
Lower the tractor hood.
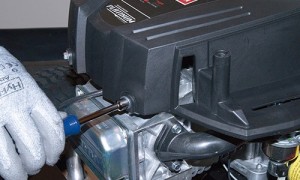
PHOTO: Reinstall the blower housing.
- 11.
Connect the battery
Reconnect the negative cable to the negative battery terminal.
Lower the seat.
Most common symptoms to help you fix your riding mowers & tractors
Choose a symptom to see related riding mower and lawn tractor repairs.
Main causes: faulty battery, bad alternator…
Main causes: damaged cutting blade, worn deck pulley, damaged mandrel pulley, loose fasteners on mower deck components…
Main causes: damaged tie rods, bent or worn wheel spindle, worn front axle, damaged sector gear assembly…
Main causes: worn or broken blade belt, broken belt idler pulley, blade clutch cable failure, bad PTO switch, damaged ma…
Main causes: punctured tire or inner tube, leaky valve stem, damaged wheel rim…
Main causes: engine overfilled with oil, leaky head gasket or sump gasket, damaged carburetor seals, cracked fuel pump, …
Main causes: clogged carburetor, damaged flywheel key, dirty spark plug, stale fuel, improper valve lash, engine needs a…
Main causes: shift lever needs adjustment, neutral control needs adjustment…
Main causes: worn or broken ground drive belt, bad seat switch, transaxle freewheel control engaged, transaxle failure, …
Most common repair guides to help fix your riding mowers & tractors
These step-by-step repair guides will help you safely fix what’s broken on your riding mower or lawn tractor.
How to replace the starter motor on a riding lawn mower
If you hear the solenoid click but don’t hear the starter motor spin when you turn the key, follow these steps to replac…
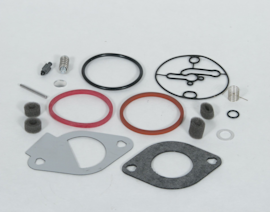
How to rebuild a riding lawn mower carburetor
Get your sputtering carburetor running smoothly in 60 minutes.…
How to replace a riding lawn mower rear tire
Your mower can’t run on a damaged rear tire. Here’s how to install a new one.…
Effective articles & videos to help repair your riding mowers & tractors
Use the advice and tips in these articles and videos to get the most out of your riding mower or lawn tractor.

Learn about all the convenient features on our Sears PartsDirect website that make your parts purchases easier.…

Get answers to frequently asked questions about Sears and Sears PartsDirect.…
Check the starter solenoid, starter motor, wiring, battery and engine.…