How to replace snowblower skid shoes video


Snowblower skid shoes attach to the side of the auger housing. The hard plastic skid shoes elevate the auger housing and scraper blade so they clear the ground, protecting them from wear and damage. The skid shoes slide along the ground so the snowblower moves smoothly.
By design, the plastic skid shoes wear down as you drive the snowblower across concrete and pavement surfaces. You’ll need to monitor and adjust the skid shoes as you use the snowblower. Adjust the skid shoes when they wear down and the scraper blade or sides of the auger housing are only 1/8-inch above the ground.
You can flip the scraper blades over to use the opposite sides on reversible skid shoes.
How to replace skid shoes
When the scraper blades wear down to the point where they need replacing, follow the steps in this DIY YouTube video to replace the skid shoes.
Position a sheet of cardboard on the ground in front of the snowblower. The sheet of cardboard should fit under the blower housing and shave plate but not under the skid shoes.
Push the snow blower on top of the cardboard sheet so the shave plate rests on the cardboard but the sides of the auger housing and skid shoes straddle the cardboard sheet.
Remove the carriage bolts, washers and hex nuts that secure the skid shoes to the snowblower auger housing.
Remove the skid shoes.
Position the new skid shoes on the snowblower with their bottom surfaces sitting flat on the ground.
Install the carriage bolts, washers and hex nut to secure the new skid shoes at the proper height.
Remove the cardboard sheet.
Frequently asked questions about snowblower skid shoes
Why do my skid shoes wear out so fast?
Here are some common reasons why skid shoes wear out quickly on snowblowers:
Tilted skid shoes can wear out faster than normal. Make sure that the entire bottom of the skid shoes sit flat on the ground.
If the skid shoe on one side of the snowblower wears out faster than the skid shoe on the opposite side of the snowblower, adjust the skid shoes as shown in our How to adjust skid shoes article/video to set skid shoes evenly and at the proper height.
Make sure that you use the original equipment manufacturer (OEM) skid shoes instead of aftermarket skid shoes. The OEM skid shoes are made of high-grade polymer plastic that will typically last longer than aftermarket skid shoes.
Rough concrete or pavement surfaces can wear out skid shoes quickly. Keep an extra set of skid shoes on hand if you have brushed concrete or rough asphalt pavement on your driveway and/or sidewalks.
Why are snowblower skid shoes made of plastic?
Skid shoes are made of plastic because the plastic slides smoothly across concrete and pavement surfaces. The hard plastic is designed to wear down gradually as you use the snowblower.
Also, plastic doesn’t retain heat so the plastic skid shoes don’t get too hot and don’t stay hot from the friction of rubbing against concrete and pavement surfaces.

Why don’t snowblower skid shoes have rollers?
Most skid shoes don’t have rollers because the rollers would have to support the weight the entire snowblower including the engine. Rolling over snow-covered surfaces can also be challenging to skid shoe rollers.
Even though rolling skid shoes aren't right for many snowblowers, they are now available for certain snowblower brands and models.
You can use these skid shoes with rollers if they fit your model of snowblower.
Keep your snowblower or snow thrower in top shape by scheduling annual maintenance by a Sears Technician.
During snowblower maintenance service, the technician will:
Check the ignition system, carburetor, throttle, and choke controls.
Clean the engine cooling fins.
Change the engine oil.
Lubricate moving parts: pivot points, cables, auger shaft, and drive plate bearing.
Lubricate, inspect, and adjust drive belts and/or chains as applicable.
Test overall operation of the snowblower and ensure that all safety features are fully operational.
Having your snowblower professionally serviced every year will help prevent unexpected breakdowns during the snow clearing season. It will also help your snowblower last longer.
Symptoms for gas snowblowers
Choose a symptom to see related snowblower repairs.
Things to do: replace the spark plug, change the oil, rebuild the carburetor, adjust valve lash, adjust or replace the b…
Main causes: clogged chute, damaged auger blades, broken shear pins, worn auger belt, damaged gear case, engine problems…
Main causes: dirty carburetor, stale fuel…
Main causes: punctured tire, damaged rim…
Main causes: dirty carburetor, clogged fuel filter, dirty spark plug, incorrect valve lash, leaky engine gaskets…
Main causes: stale gas, clogged carburetor, clogged or broken fuel line, dirty spark plug, bad rewind starter, incorrect…
Main causes: loose drive clutch cable, damaged drive clutch cable, worn friction disc, scraper blade scraping the ground…
Main causes: snow build-up in chute, chute drive mechanism failure, bad chute control assembly…
Main causes: clogged chute, snow build-up in auger housing, broken auger shear pins, auger drive belt needs adjustment, …
Repair guides for gas snowblowers
These step-by-step repair guides will help you safely fix what’s broken on your snowblower.
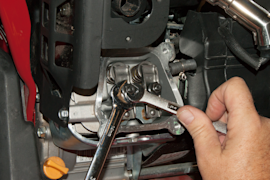
How to adjust snowblower engine valve lash
Adjust the engine valve lash on your snowblower to keep the engine starting and running smoothly.…

How to adjust snowblower skid shoes
To prevent snowblower auger and shave plate damage, adjust the skid shoes regularly to keep the shave plate ¼-inch high.…
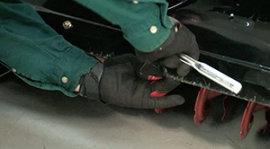
How to replace a snowblower shave plate
Follow the 7 easy steps in this repair guide/video to replace a worn out shave plate on your snowblower.…
Articles and videos for gas snowblowers
Use the advice and tips in these articles and videos to get the most out of your snowblower.
Get an overview of the main steps in a snowblower tune-up and click to videos with more details.…
Get your snowblower ready for winter before winter arrives, so you don't have to mess with it while snow piles up.…
Protect your snowblower's engine and body by preparing it for after-season storage.…