Troubleshooting a direct-drive top-load washer that won't fill video

If your top-load direct-drive washer won’t fill with water, several components could be to blame. For example, the washer could have a malfunctioning water inlet valve or water level pressure switch, or it could be the timer or temperature switches. This video from Sears PartsDirect shows how to troubleshoot problems with your washer, including checking for continuity with a multimeter to find out which part needs to be replaced so that you can get your washer working again.
For more symptoms, error code tables and repair guides, check out our DIY washer repair section.
Check water flow and power
Hi, this is Wayne with Sears Parts Direct. Today we're going to talk about troubleshooting a top-load washer that won't fill with water.
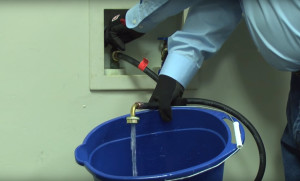
Let’s start with the obvious stuff. Make sure the water faucets behind the washer are turned on. Then check for water flow through the fill hoses by unplugging the washer, turning off the faucets and disconnecting the hoses from the back of the washer. Hold each hose end over a bucket and briefly turn on the faucet. If you don't have any water coming out, check for a clog in the hoses. If the hoses are okay, you could have a problem with your house water supply. If water is flowing from the supply hoses, then you should check the inlet screens on your water valve for clogs. These screens can’t be cleaned because removing them can let debris into the valve, causing it to leak and malfunction. If your inlet screens are clogged, you’ll have to replace the water valve assembly. Here's a video that will show you how. While you're behind the washer, check the electrical outlet to make sure that it's working. You can plug in a lamp to test it. If you don’t have power, reset the circuit breaker and if that doesn’t work, get an electrician to repair the outlet. If you’ve got power and your water supply and inlet valve screens are okay, let’s move on to some more advanced stuff.
Hook the washer back up to the water supply, reconnect the power, turn the washer timer to the start of the rinse cycle and pull the start knob. The rinse cycle uses the most direct path to the fill valve and bypasses the temperature switch. If the washer fills in the rinse mode, you know that the pressure switch and the fill valve are both okay. You can eliminate them as possible failures and test the temperature switch next. Now, if the washer doesn't fill in the rinse mode, then we've isolated the problem to the water inlet valve, water level pressure switch, the timer or a wiring problem.
Is water inlet valve working?
Next, we'll check for continuity through the entire electrical circuit with a multimeter. This will tell us if the cold-water valve is getting the current it needs to open. For safety, always unplug your washer before checking continuity. Shut off the water supply. Pull the plastic end caps off the sides of the control console. Remove the screws at the base of the control console. Pull the control console slightly forward and then swing it up and over the top of the back panel. Unplug the wire harness from the lid switch on the washer's top panel. Release the clips that secure the cabinet to the washer's back panel. Using a slot screwdriver, pry the clips forward to release them. Lift the back of the cabinet and slide it forward to remove it from the washer frame.
Set your multimeter to check resistance. Place one meter probe on the right prong of the power cord and the other on the yellow and red wire connected to the cold water valve. You should see near 0 ohms of resistance, which indicates that you have a clear path for voltage to the cold water valve in the rinse portion of the cycle. Next, check the other side of the circuit. Put your leads on the white wire and the left prong of the outlet cord. You should have continuity through the neutral side of the circuit as well. If you had continuity on both sides of the circuit, then the cold water valve is apparently getting voltage but not opening to allow water flow, meaning you’ll need to replace your water inlet valve.
Check for broken wires
If you didn’t have continuity on either wire—on this meter that’s a “1” in the far left corner—then do more checks to find the break in the circuit. If the white wire didn’t have continuity, you’ll need to check each section of wiring until you find the break and repair any broken wires that you find. This video has more information about repairing wires.
Check the pressure switch
If the water inlet valve isn’t the problem, the next thing to check is the water level pressure switch. If the yellow/red wire didn't have continuity, check from the power cord to the pressure switch. Place one meter lead on the right prong of the power cord and the other on the pink wire on the water level pressure switch. If you measure no continuity, check between the violet and pink wires on the pressure switch. If you measure no continuity there, then the break must be in the pressure switch. This video will show you how to replace your pressure switch.
Test for a timer or wiring failure
Now, if you measured continuity between the violet and pink wires, the problem is either the timer or a wiring failure in the circuit. Check for continuity on the violet wire between the timer and the water level pressure switch. If there's no continuity on the violet wire then that wire will need to be repaired. If there is continuity on the violet wire, check between the violet wire and the black wire on the timer. If you measure no continuity, you’ll need to replace the timer because it's not allowing voltage through the circuit. This video will show you how to replace a timer. If you’ve got continuity through the timer, then you must have a break in wiring harness between the timer and the power cord. Find and repair that break.
Now, if your washer filled in the rinse mode, you know that both your water valve and pressure switch are both okay. The timer provides a path for electrical current to the cold-water valve during the rinse cycle, but it uses different internal contacts to provide the current to the cold-water valve to fill the washer at the start of the wash cycle. We'll need to open the console and test the water temperature switch and timer. If you skipped to this section, you can find instructions for opening the console earlier in this video.
Check the water temperature switch
We'll be using a multimeter to check for continuity through the temperature switch to see if it allows current to flow to the cold water valve. Set the temperature switch to Cold/Cold. That should give us a path through the switch to the cold-water valve. With the washer unplugged, check between the pink wire and yellow/red wire connected to the temperature switch. If you measure no continuity through those wires, then replace the temperature switch. Here's a video that will show you how. Now, if you measure continuity through the temperature switch, you’ll need to replace the timer. The timer isn't closing internal electrical contacts to allow current to flow to the water valve. To reassemble the washer, tilt the back of the cabinet up, push the base forward and slide the lip under the front base. Lower the back of the cabinet so the alignment tabs fit into the holes. Reinstall the spring clips at the top of the cabinet. Plug the lid switch wire harness back in. Flip the control console down and position it properly on the top panel of the washer. Reinstall the mounting screws at the base of the control console. Snap the plastic end caps onto the sides of the control console.
Well, I hope this video helped you out. Be sure to check out our other videos here on the Sears PartsDirect YouTube Channel and don’t forget to subscribe.
When you're unable to resolve a problem with your washer not filling on your owner, schedule appliance repair service and we'll send a Sears Home Services technician to your home to fix the washing machine.
Repair guides for top-load washers
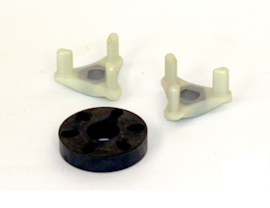
How to replace the motor coupler on a top-load washer
If the washer drains but won’t agitate or spin, the motor coupler might have broken to protect the drive motor from dama…
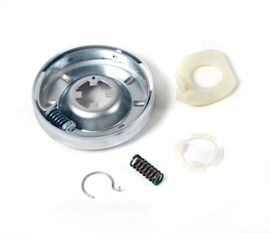
How to replace the clutch assembly in a top-load washer
If the washer spins when the basket is empty but not when the basket is full, the problem could be the clutch assembly. …
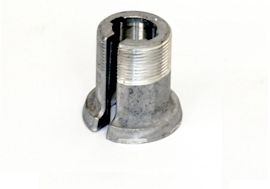
How to replace the drive block on a top-load washer
The drive block rotates the spin basket. If the basket wobbles or rattles in the spin mode because the drive block is wo…
Articles and videos for top-load washers

Find tips for using your washing machine efficiently to save energy and help reduce utility bills.…

Learn about all the convenient features on our Sears PartsDirect website that make your parts purchases easier.…

Get answers to frequently asked questions about Sears and Sears PartsDirect.…