CONFIRM THE PART FITS
Part Information
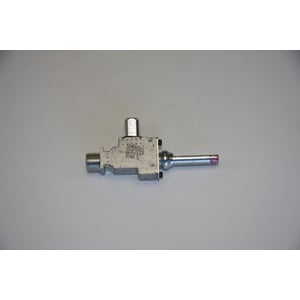
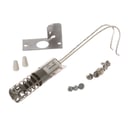
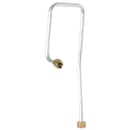
This surface burner valve (part number WB21K21) is for ranges.
Surface burner valve WB21K21 controls the flow of gas to the surface burner.
Unplug the range and shut off the gas supply before installing this part. Wear work gloves to protect your hands.
Frequently Used Together
- $77.48 |7% OFF Phone Price : $83.48
- $31.11
- $18.44 |10% OFF Phone Price : $20.44
- $86.63 |6% OFF Phone Price : $92.63
- $28.38 |17% OFF Phone Price : $34.38
Top models using the same part
| Model Name | Model Number | Diagram Name |
|---|---|---|
| Model #36275585892 Kenmore gas range | 36275585892 | Gas & burner parts |
| Model #3627586992 Kenmore gas range | 3627586992 | |
| Model #JGB905CEF3CC GE gas range | JGB905CEF3CC | |
| Model #JGB905BEF3BB GE gas range | JGB905BEF3BB | |
| Model #JGBP79BEB7BB GE gas range | JGBP79BEB7BB | |
| Model #EGR3001EH1SS GE gas range | EGR3001EH1SS | |
| Model #JGBP79CEB7CC GE gas range | JGBP79CEB7CC | |
| Model #36272622300 Kenmore gas range | 36272622300 | |
| Model #36275621300 Kenmore gas range | 36275621300 | |
| Model #36275624301 Kenmore gas range | 36275624301 |
Reviews
Straightforward repair for a repairperson
Pull range out from wall. Turn off gas. Unplug power cord. Remove grates, drip pans, and burner components. Depress locking clips at each side of front of stovetop and raise stovetop (support rods will hold it in place). Remove on/off knobs. Remove 2 screws at sides of each valve stem and screws above and under valve cover. Carefully pull cover out and down because igniter circuit wires are attached. Use a box wrench or small adjustable wrench to loosen compression nut at back of valve. Use care because the gas line is aluminum. Remove 1/4 in. hex screw holding valve to frame/gas supply and remove valve. I suggest test fitting the compression nut to the valve before mounting the valve. Also, it may be easier if you remove the gas line from the burner side as well. If all goes well, finger tighten the nuts and secure the new valve to the frame using the new hex screw provided. Finish tightening the nuts with a wrench. Turn gas back on and check for leaks. You can put your finger over the gas riser orifice and turn on the gas valve to assure there is no leak in the aluminum tube fittings. Reassemble by reversing the disassembly steps at the beginning of this description. Plug in electrical cord and test operation of all burners.
John4551, Monmouth County, NJ
Did you find this review helpful?
- Ease of Installation
- Moderate
- Duration of Installation
- 1 - 2 hours
Yes perfect
No took longer, but works great,will order from seats again
Kevo, Md
Did you find this review helpful?
- Ease of Installation
- Moderate
- Duration of Installation
- 1 - 2 hours
Easy to Install
It was easy opening up the stove and replacing the old burner valve. Works great.
johns., Long Island, NY
Did you find this review helpful?
- Ease of Installation
- Very Easy
- Duration of Installation
- 30 minutes - 1 hour
