CONFIRM THE PART FITS
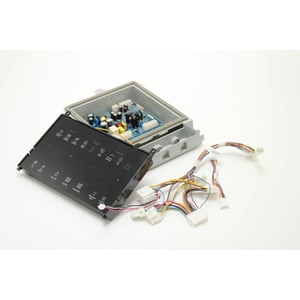
Refrigerator User Interface 5303918591
Part #5303918591
Part Information
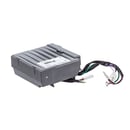
This user interface (part number 5303918591) is for refrigerators.
User interface 5303918591 houses the selection buttons and electronic display for the refrigerator, and lets you control various settings for the refrigerator.
Safely store any food that could deteriorate while the power is off and unplug the refrigerator before installing this part. Wear work gloves to protect your hands.
Frequently Used Together
- $211.64 |5% OFF Phone Price : $223.64
- $254.58 |5% OFF Phone Price : $266.58
- $129.06 |9% OFF Phone Price : $141.06
- $99.29 |11% OFF Phone Price : $111.29
- $128.45 |9% OFF Phone Price : $140.45
Top models using the same part
| Model Name | Model Number | Diagram Name |
|---|---|---|
| Model #EI28BS56IB6 Electrolux bottom-mount refrigerator | EI28BS56IB6 | Controls & ice dispenser |
| Model #EI23BC56IW1 Electrolux bottom-mount refrigerator | EI23BC56IW1 | Controls & ice dispenser |
| Model #EI28BS56IB1 Electrolux bottom-mount refrigerator | EI28BS56IB1 | Controls & ice dispenser |
| Model #EI28BS55IS1 Electrolux bottom-mount refrigerator | EI28BS55IS1 | Controls & ice dispenser |
| Model #EI28BS55IW0 Electrolux bottom-mount refrigerator | EI28BS55IW0 | Controls & ice dispenser |
| Model #EI23BC55IB1 Electrolux bottom-mount refrigerator | EI23BC55IB1 | Controls & ice dispenser |
| Model #EI28BS56IS0 Electrolux bottom-mount refrigerator | EI28BS56IS0 | Controls & ice dispenser |
| Model #EI28BS56IB0 Electrolux bottom-mount refrigerator | EI28BS56IB0 | Controls & ice dispenser |
| Model #EI28BS55IB1 Electrolux bottom-mount refrigerator | EI28BS55IB1 | Controls & ice dispenser |
| Model #EI28BS55IB0 Electrolux bottom-mount refrigerator | EI28BS55IB0 | Controls & ice dispenser |
Reviews
Got the display back
The LCD display had burned out on our refrigerator. The freezer temp was completely out and the refrigerator temp was starting to go. The manufacturer has changed the part but the included wiring harness and instructions were pretty straight forward. Figuring out how to get the old UI out was my first challenge. You have to pry the ring around the ice and water chute off and it's on pretty tight. I got a flat plastic tool between the old UI and the ring then worked my way around. Then to get the UI out take the two screws out at the top and push on the ice chute. The UI tilts out at the top pretty easily. You have to swap out both parts otherwise the user interface beeps and seems to have a mind of its own. The main board is a little tougher to swap out. It's on the bottom of the refrigerator just behind the toe kick/grill. One screw on the front of the main board housing is all it takes to let it slide out. You need to flip it over to remove a screw on a plastic retianing clip. Getting that clip off and reinstalling it was the most challenging part for me just due to there not being much slack in the wiring. Once you swap the wires from the old housing to the new housing, connect up the wiring harness connections on the new main board and you're just about done. When you slide the housing back in, there is a clip on the bottom of the refrigerator that the back of the housing slides into to hold it securely to the bottom of the refrigerator. Replace the one screw holding the housing and you're done. Saved over twice the cost of this part by doing it myself versus calling someone to replace it.
DIYSwing, Nashville, TN
Did you find this review helpful?
- Ease of Installation
- Moderate
- Duration of Installation
- 1 - 2 hours
