CONFIRM THE PART FITS
Part Information
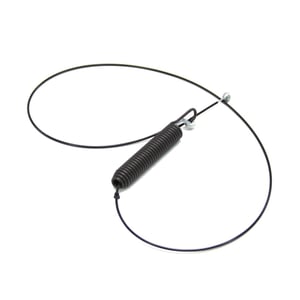
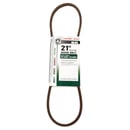
This drive cable (part number 946-05067) is for snowblowers.
Drive cable 946-05067 connects the motion control lever to the drive system in the snowblower.
Follow the instructions in the manual when installing this part.
Frequently Used Together
- $12.58
- $32.96 |15% OFF Phone Price : $38.96
- $32.27 |16% OFF Phone Price : $38.27
- $9.85 |9% OFF Phone Price : $10.85
- $29.36 |17% OFF Phone Price : $35.36
- $19.56 |9% OFF Phone Price : $21.56
- $21.16 |22% OFF Phone Price : $27.16
- $74.45 |7% OFF Phone Price : $80.45
- $64.52 |10% OFF Was : $71.69
- $14.98 |12% OFF Phone Price : $16.98
Top models using the same part
| Model Name | Model Number | Diagram Name |
|---|---|---|
| Model #31AH5DTH793 MTD gas snowblower | 31AH5DTH793 | Transmission |
| Model #31AS5BHE799 MTD gas snowblower | 31AS5BHE799 | Wheels/gearbox/driveshaft |
| Model #247888702 Craftsman gas snowblower | 247888702 | Drive shaft/wheels |
| Model #31AM5CSF799 MTD gas snowblower | 31AM5CSF799 | Drive shaft/wheels |
| Model #247888701 Craftsman gas snowblower | 247888701 | Drive shaft/wheels |
| Model #31AH54TI799 MTD gas snowblower | 31AH54TI799 | Drive shaft/wheels |
| Model #CMXGBAM1054544 Craftsman gas snowblower | CMXGBAM1054544 | Transmission |
| Model #247886400 Craftsman gas snowblower | 247886400 | Wheels/gearbox/driveshaft |
| Model #247887940 Craftsman gas snowblower | 247887940 | Drive shaft/wheels |
| Model #CMXGBAM1054542 Craftsman gas snowblower | CMXGBAM1054542 | Transmission |
Reviews
Replacement cable.
It was easy to install. Old part came right off. New part was an exact fit. Approximately 15 min. to install.
Jason, Star Valley Ranch, Wy.
Did you find this review helpful?
- Ease of Installation
- Difficult
- Duration of Installation
- More than 2 hours
Yes, I would recommend this to a friend
Easy to install
Took about 45 minutes and moderately easy to install.
Dale, Lansing, Mi
Did you find this review helpful?
- Ease of Installation
- Easy
- Duration of Installation
- 30 minutes - 1 hour
Yes, I would recommend this to a friend
easy to install!
it only took seconds to install! sears is a great company and I wished that some of the stores would not of closed.
westporter, westport, ma.
Did you find this review helpful?
- Ease of Installation
- Very Easy
- Duration of Installation
- Less than 30 minutes
Not quite what I needed
It took some engineering but got the cable to work. It's not adjustable and doesn't come with any sleeves to keep it protected from rubbing up against the metal.
Mattismoi, Colorado
Did you find this review helpful?
- Ease of Installation
- Very Difficult
- Duration of Installation
- More than 2 hours
Quick Install
The metal piece on the drive cable that fastens to the handle broke in two on an extremely cold day. After looking at it, it is probably the "weak link" in the cable assembly and should be made sturdier. However, the new cable was an exact fit and easy to install. Most work was taking the plate off the bottom (4 screws, 3/8"). The bolt (7/16") for the little reel also needs to be loosened to get the new cable to feed around the reel. I didn't have to remove the bracket with the reel at all. Be careful when buying the drive cable as for some reason seemed tougher to find than the auger clutch cable and the speed control cable. They are all different lengths, at least. To install, I did have to tug the cable (engage the clutch) to get it to reach the handle. At first it looked too short but it was a perfect match once installed at the handle. A leisurely 15-20 minutes install, and that included looking for tools and trying to stay warm. Probably 5-10 minutes for someone who knows what they are doing and keeps their tool box organized.
FrostbitNitwit, Watertown, NY
2 people thought this review was helpful.
- Ease of Installation
- Very Easy
- Duration of Installation
- 30 minutes - 1 hour
Took longer to drain the fuel
Drain Fuel, place piece of wood in front of the machine to stop auger taking weight when turning machine onto its front. Remove 4 bolts from bottom panel and ease panel off. Loosen pulley bolt on tension plate so old cable can be removed. Unhook old cable spring from mechanism. Attach new cable to the handle, route around pulley and tighten pulley bolt, being careful to keep pulley centered. This is critical as you could tighten it off center and break the plastic pulley. Using pliers, take spring end and pull it enough to engage the clutch mechanism. Refit bottom plate. Make sure the cable doesn't rub against the plate. There is a slot. Adjusting the tension plate slightly can ensure it doesn't rub. Cable should have no slack, but not be really tight. To tight and the machine will take off when you start it. Refill fuel tank. I left the machine for a few minutes to let the oil settle. Start and make sure the machine doesn't move until you operate the clutch drive lever. If it does move, loosen bolts on tension plate and adjust to allow a little less tension. Job done.
Micromart, Minnesota
1 person thought this review was helpful.
- Ease of Installation
- Very Easy
- Duration of Installation
- 30 minutes - 1 hour
