CONFIRM THE PART FITS

Lawn & Garden Equipment Engine Carburetor 799447
Part #799447
Part Information
Helpful DIY instructions: Installation guide with video.
This carburetor (part number 799447) is for lawn and garden equipment engines.
Carburetor 799447 mixes air and gas before the fuel mix goes to the engine.
Wear work gloves to protect your hands and work in a well-ventilated area during this repair.
Frequently Used Together
- $8.14
- $6.89 |13% OFF Phone Price : $7.89
- $11.34 |15% OFF Phone Price : $13.34
- $9.89 |9% OFF Phone Price : $10.89
- $30.02 |17% OFF Phone Price : $36.02
- $20.38 |23% OFF Phone Price : $26.38
Top models using the same part
| Model Name | Model Number | Diagram Name |
|---|---|---|
| Model #112P02-0117-F2 Briggs & Stratton lawn & garden engine | 112P02-0117-F2 | All parts |
| Model #112P02-0113-B1 Briggs & Stratton lawn & garden engine | 112P02-0113-B1 | All parts |
| Model #112P02-0117-F1 Briggs & Stratton lawn & garden engine | 112P02-0117-F1 | All parts |
| Model #122R02-0008-F1 Briggs & Stratton lawn & garden engine | 122R02-0008-F1 | All parts |
Reviews
Replaced carburetor on pressure washer.
Easy to install. Solved the problem of leaking gas.
Patch47, Nashville Tennessee
Did you find this review helpful?
- Ease of Installation
- Very Easy
- Duration of Installation
- Less than 30 minutes
Did not work
Sorry it did not work. The technician reworked my old one to make my pressure washer work. He said that one of the valves was bent. Tried to fix but couldn't. I'm paying yto have it installed. So we used original. Hopefully it will last a lifetime.
Mike J, Newburypark
Did you find this review helpful?
- Ease of Installation
- Very Easy
- Duration of Installation
- More than 2 hours
Easy to install
It was easy to install and corrected the problem with the pressure washer
Frank142, Reading, PA.
Did you find this review helpful?
- Ease of Installation
- Easy
- Duration of Installation
- 30 minutes - 1 hour
Came fast, good price, easy to install
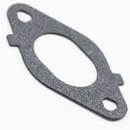
My about 10 year old Sears pressure washer wouldn't start. Usually, with gasoline engines, it's because you don't use them enough and the gas evaporates and gums up the carburetor. Not having good lock "rebuilding" any carb in the past, I checked for a Sears "replacement" carb. Fortunately, they had one for my model. The price and shipping seemed very reasonable so I ordered. Within a few days, it arrived. It came with 3 gaskets although I only used one as will be described. Advice: Take pictures of the installation BEFORE you take it apart. Use an IPAD or a phone and print out the pictures. In my case, there were two springs and 2 linkages to be removed. See Photo attached. Write down the sequence you use to remove the old part. Then, you can easily reverse the sequence during the new part installation. As appropriate, put screws and removed parts in plastic bags, like "snack bags" and label so similar parts can't be confused. Put the pressure washer on a plywood board sitting on saw horses. Repairing the unit on the ground may increase the chances of making a mistake. Remove the springs first. The linkages can really only be disconnected with the carb removed from the engine. Only take apart what you need to. The carb is mounted to the engine via a "spacer". The spacer contains an o ring and a gasket. I chose not to remove and replace these two gaskets figuring I could always go back later and do it. After completing the installation, "wiggle" things around to make sure that any wires or links or springs are not binding.

gwlinn, Tampa, Florida
Did you find this review helpful?
- Ease of Installation
- Very Easy
- Duration of Installation
- 30 minutes - 1 hour
