KitchenAid HE dishwasher error codes

These error code explanations can help you diagnose a problem with your KitchenAid HE dishwasher. For repair how-to help, visit the PartsDirect repair help section, which includes repair help for dishwashers, other major appliances, lawn and garden equipment, garage door openers, vacuum cleaners and more. Search for your model number to find a complete list of parts for your dishwasher.
Digital display models show the error codes on the control panel.
Models without a digital display signal error codes by flashing the Clean light in a pattern unique to the error. The light first flashes the Function code, pauses for 2 seconds, and then flashes the Problem code. For example, 6 flashes followed by 1 flash (6-1) means "Inlet Water" function, "The electronic control doesn't detect water entering the dishwasher tub" problem. After a 5-second pause, the light repeats the pattern. The control console is disabled when an error code is flashing.
When you need [KitchenAid dishwasher repair](https://www.searshomeservices.com/repair/kitchenaid/dishwasher), trust the pros at Sears Home Services to fix the problem.
Stuck relay on the electronic control board
Shut off power to the dishwasher for 5 minutes. If the code resumes when you restore power, check the wiring connected to the control board for damage and repair any broken wires. Measure the resistance through all components connected to the control board using the tech sheet as a guide. You can find the tech sheet behind the bottom front toe panel of the dishwasher. Replace any defective components. If the wiring and components are okay, replace the electronic control board.
Damaged or corrupted memory on control board. Incompatible software components inside microprocessor.,
Shut off power to the dishwasher for 5 minutes. If the code resumes when you restore power, replace the electronic control board.
Stuck button on the user interface control
Check all buttons on the user interface control for a response. If one or more of the buttons don't work, unplug the dishwasher to disconnect electrical power and disconnect the user interface control wire harness. Reassemble the door with the user interface wire harness disconnected, but don't close the door. Plug in the dishwasher and wait at least 7 seconds for the electronic control board to power up completely. Then close the door. If the electronic control no longer detects stuck buttons with the user interface wire harness unplugged, it will start the drain pump. If the drain pump runs, replace the user interface control. If the drain pump doesn't run, then replace the electronic control board because it still detects stuck buttons with the user interface control unplugged.
User interface control can't communicate with electronic control board
Shut off power to the dishwasher. Check the wiring between the user interface control and the electronic control board. If the wires and connections are okay, replace the user interface control board. If the problem persists, replace the electronic control board.
Thermistor/OWI sensor failure (The thermistor is the water temperature sensor, the OWI sensor is the Optical Water Indicator that detects the amount of debris in the water.)
Unplug the dishwasher to disconnect electrical power and then check the wiring between the electronic control board and the thermistor/OWI sensor. Repair or replace the wire harness if broken. If you find the wiring undamaged, replace the thermistor/OWI sensor.
Shorted thermistor/OWI sensor
Unplug the dishwasher to disconnect electrical power and then check the wiring between the electronic control board and the thermistor/OWI sensor. Repair or replace the wire harness if broken. If you find the wiring undamaged, replace the thermistor/OWI sensor.
OWI failed to calibrate or the drain hose check valve failed, allowing dirty water to backflow into the dishwasher
Disconnect the dishwasher drain hose connection from the air gap or the garbage disposal if you have no air gap. Pour water through the drain hose to see if water backs up into the dishwasher tub. If so, replace the portion of the drain hose that connects to the drain pump because the check valve in that hose failed. If water doesn't back up into the dishwasher through the drain hose, reconnect the hose and run the Service Diagnostics Test according to the instructions in the tech sheet. You should see low soil level indicated during the OWI test in the diagnostic mode. If you see high soil level during the OWI test, unplug the dishwasher and clean the OWI sensor. Reassemble the dishwasher and plug the dishwasher back in to restore electrical power. Run the diagnostic test cycle so the electronic control board will calibrate the OWI sensor on the next cycle. Run a normal wash cycle. If you still see the error code, replace the thermistor/OWI sensor.
Communication error between the electronic control board and the circulation pump motor
Unplug the dishwasher to disconnect electrical power. Check the circulation pump wire harness and reconnect any loose wires or replace the wire harness if damaged. If the wiring connections are okay, replace the circulation pump and motor assembly. If the problem continues, replace the electronic control board.
Door switch failure
This code appears if you don't close the door within 4 seconds of pressing the Start/Resume button, or if the door latch assembly is broken. When starting a cycle, close the door within 4 seconds after pressing Start/Resume. If you can't start the cycle and the code continues, then the door switch could be defective. Unplug the dishwasher to disconnect electrical power. Disassemble the door and check the door switch wire harness. Reconnect any loose wires or replace the wire harness if damaged. If the wire harness is okay, replace the door latch assembly.
Control detects door not opening
The electronic control board expects to see the door open between cycles or the dishwasher won't start the next time you try to start a new cycle. If you didn't open the door between cycles, cancel the cycle. Open and shut the door, and then start a new cycle. If the cycle still won't start, then the door switch could be defective. Unplug the dishwasher, then plug it back in to simulate the door opening. If the cycle starts, replace the door latch assembly because the door switch isn't detecting the door opening.
Won't fill
Check for an item stuck under the overfill float and remove it. If the overfill float sticks in the "up" position the dishwasher won't fill. Unplug the dishwasher to disconnect electrical power and shut the water supply valve. Disconnect the water supply line from the water inlet valve and check the water inlet valve screen for clogs. Replace the water valve if you find the screen clogged because debris from the clog can get into the valve body, causing the valve to stick open and possibly flood your kitchen. If the screen is clear, place the end of the water supply line in a shallow pan and briefly open the water supply valve to see if water flows from the supply line. If water doesn't flow, have a plumber repair the water supply to your dishwasher. If the water flows okay, check the wiring connections on the water inlet valve and reconnect any loose wires or replace the wire harness if damaged. If the wires are okay, you may need to replace the water inlet valve or the electronic control board.
Water inlet valve failure
Unplug the dishwasher to disconnect electrical power. Remove the bottom front access panel and toe panel. Check the wire harness connections on the water inlet valve. Reconnect any loose wires. Replace the wire harness if damaged. If the wire harness connections are okay, check the resistance of the water inlet valve using a multimeter. You should measure around 1,400 ohms of resistance through the water inlet valve. If you measure infinite resistance, replace the water inlet valve. If the problem continues, replace the electronic control board.
Suds or air are in the water pump
Check for sudsy water. If you see excessive suds, try to drain the dishwasher by cancelling the cycle. The drain pump will run for 3 minutes. If the drain pump can't drain the sudsy water, drain the water by hand or use a wet/dry shop vacuum to remove the water. Check the detergent dispenser and replace if it's damaged. Use only dishwasher detergent in the dishwasher. Using regular dish soap in the dishwasher causes excessive suds. If you don't see excessive suds, check the water fill level in the tub because low water level causes air in the pump. The water level should just touch the bottom of the overfill float mushroom. If you find the water level too low, check for bowls or containers that flipped over during the cycle that could be holding water. Load items so they don't flip over during the cycle and cause low water level. If you didn't find bowls or containers flipped over and holding water, then a defective water inlet valve could cause the low water level. Unplug the dishwasher to disconnect electrical power and close the water supply valve. Disconnect the water supply line from the water inlet valve and check the water inlet valve screen for clogs. Replace the water valve if you find the screen clogged because debris from the clog can get into the valve body, causing the valve to stick open and possibly flood your kitchen. If the screen is clear, place the end of the water supply line in a shallow pan and briefly open the water supply valve to see if the water flows from the supply line. If water doesn't flow, have a plumber repair the water supply to your dishwasher. If the water flows okay, check the wiring connections on the water inlet valve and reconnect any loose wires or replace the wire harness if damaged. If the wires are okay, you may need to replace the water inlet valve.
The float switch is open
Check the overfill float switch to see if it's stuck or if an item is stuck under it. Check if the inlet water fill valve is properly shutting off the water supply when the dishwasher is off.
Incoming water is too cold
Use an accurate thermometer to check the water temperature. If it's lower than 110 degrees F, check your water heater. water heater. If the water temperature is normal (110 to 120 degrees F), replace the thermistor/OWI or the electronic control board. Refer to the tech sheet for your dishwasher for a diagnostic test for the thermistor.
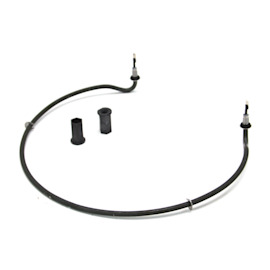
Heating element doesn't work
Shut off power to the dishwasher. Inspect the heating element and replace it if it's visibly damaged. If not, check the wiring to the heating element. If the wiring is intact, replace the heating element.
Heating element won't shut off
Shut off power to the dishwasher for 5 minutes. If the code resumes when you restore power, replace the electronic control board.
Slow drain
Shut off power to the dishwasher and then shut off water. Check the drain path for an obstruction. If the drain path is clear, check the wiring on the drain pump. If the wiring is intact, replace the drain pump.
Drain pump electrical problem
Shut off power to the dishwasher and then shut off water. Check the wiring on the drain pump. If the wiring is intact, replace the drain pump.
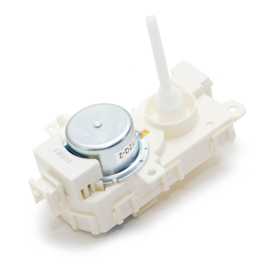
Electronic control board can't detect the position of the diverter disc
The diverter motor positions the disc that directs the water through the lower spray arm or the upper spray arm. The diverter motor also monitors the position of the diverter disc and sends position signals to the electronic control board. Unplug the dishwasher to disconnect power and check the wiring going to the diverter motor. Reconnect any loose wires or replace the wire harness if damaged. If the wiring is intact, replace the diverter motor because it isn't sending position signals to the electronic control board.
Diverter motor is stuck on
The diverter relay on the electronic control board is defective. Unplug the dishwasher to disconnect electrical power and replace the electronic control board.
Diverter disc is missing
Remove the dishracks and the lower spray arm. Pull out the TurboZone manifold and the feed tube. Remove the pump outlet and check the diverter disc. Replace the disc if it's broken or missing.
Lower spray arm error
Check for obstructions blocking the lower spray arm from turning. Shut off power to the dishwasher and check the wiring connections on the lower spray arm motor. If the wiring is intact, replace the lower spray arm motor.
Detergent dispenser failure
Unplug the dishwasher to disconnect electrical power. Remove the outer door panel and check the wiring connections between the electronic control board and the detergent dispenser. Reconnect any loose wires or replace the wire harness if damaged. If the wiring is intact, replace the detergent dispenser.
Vent wax motor electrical problem
Shut off power to the dishwasher. Check the wiring in the vent wax motor circuit. If the wiring is intact, replace the vent wax motor.
Drying fan failure
Unplug the dishwasher to disconnect electrical power. Check the wiring between the electronic control board and the drying fan. Reconnect any loose wires or replace the wire harness if damaged. If the wiring is intact, replace the drying fan.
Most common symptoms to help you fix your dishwashers
Choose a symptom to see related dishwasher repairs.
Main causes: water supply problem, stuck overfill float, clogged water inlet valve screen, water inlet valve failure…
Main causes: clogged kitchen sink drain, clogged drain hose, drain check valve damaged, drain pump failure, control syst…
Main causes: broken door spring, damaged or broken door hinge…
Main cause: damaged rack height adjuster…
Main causes: improper loading, low water temperature, improper detergent dosage, detergent dispenser failure, spray arm …
Main causes: light switch beside the sink turned off, lack of power, bad dishwasher door switch, control system failure,…
Main causes: not using rinse aid, rinse aid dispenser failure, broken heating element, malfunctioning vent, drying fan f…
Main causes: broken door latch, tripped circuit breaker, broken heating element, faulty vent fan, sensor failure, contro…
Main causes: glass or popcorn kernel stuck in the chopper blade, drain line vibrating against the cabinet, debris in was…
Most common repair guides to help fix your dishwashers
These step-by-step repair guides will help you safely fix what’s broken on your dishwasher.

How to replace a dishwasher heating element
Dishes not drying as fast as they should? The dishwasher heating element could be on the fritz. Here's how to install a …

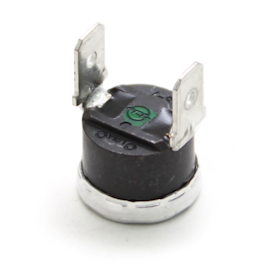
How to replace a dishwasher high-limit thermostat
Follow these steps to replace the high-limit thermostat in your dishwasher if prevents the heating element from heating.…

How to replace a dishwasher diverter motor
Upper spray arms not getting water? The diverter motor could be broken. Use this guide to replace it.…
Effective articles & videos to help repair your dishwashers
Use the advice and tips in these articles and videos to get the most out of your dishwasher.

Get tips on completing essential holiday cleaning tasks to brighten your home.…

Learn about all the convenient features on our Sears PartsDirect website that make your parts purchases easier.…

Get answers to frequently asked questions about Sears and Sears PartsDirect.…