How to rebuild a lawn mower carburetor
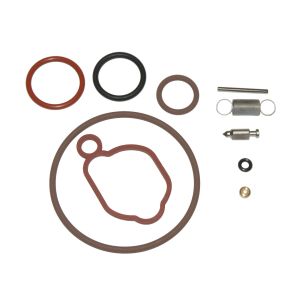
This DIY lawn mower repair guide gives instructions for how to rebuild a lawn mower carburetor. The carburetor blends air with fuel to form a combustible mixture that ignites in the cylinder to drive the piston. If the carburetor is clogged or damaged, the engine runs rough or won’t start. If the carburetor is clogged or damaged, rebuild it with a manufacturer-approved carburetor rebuild kit.
Follow these basic steps to rebuild the carburetor on common Briggs & Stratton engines that power Craftsman, MTD, Toro, Husqvarna, Troybilt, Poulan and Cub Cadet walk-behind lawn mowers.
If you'd rather replace the carburetor, How to Replace a Lawn Mower Carburetor shows you how.
This video explains how to rebuild the carburetor on a walk-behind lawn mower.
Instructions
- 01.
Disconnect the spark plug wire
Move the lawn mower to a well-ventilated work space and disconnect the spark plug wire from the spark plug.
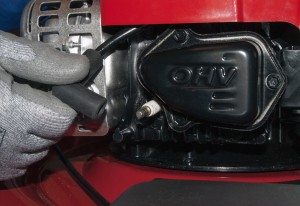
PHOTO: Disconnect the spark plug.
- 02.
Remove the air filter housing
Release the catch and pull the air filter cover off.
Remove the air filter.
Remove the screws from the air filter base.
Release the breather tube and pull off the air filter base.
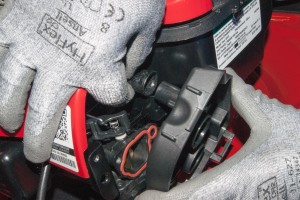
PHOTO: Pull off the air filter base.
- 03.
Drain the fuel tank
Place a shop rag under the fuel tank to catch spills.
Place a fuel-safe container under the gas line connection to the fuel tank.
Release the spring clamp and disconnect the fuel line from the gas tank.
Drain the gasoline into the container.
Wipe up any spills.
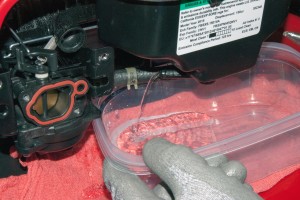
PHOTO: Drain the gasoline.
- 04.
Remove the blower housing
Release the starter rope from the mower handle.
Remove the screws from the blower housing.
Pull the blower housing off the engine.
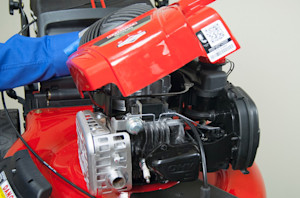
PHOTO: Remove the blower housing.
- 05.
Remove the carburetor
Separate the carburetor mounting bracket arms to release the carburetor and disconnect the carburetor from the carburetor adapter.
Holding the carburetor above the bracket, disconnect the governor and choke linkage rods and remove the carburetor.
Release the fuel line spring clamp and pull the fuel line off the carburetor.
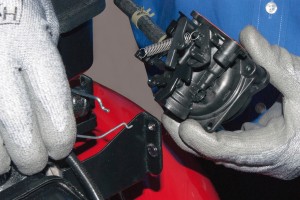
PHOTO: Remove the carburetor from the lawn mower.
- 06.
Rebuild the carburetor
Place the carburetor on a clean work surface.
Remove the choke return spring.
Use an Allen wrench to remove the float bowl drain plug and drain fuel from the float bowl into your fuel-safe container.
Replace the float bowl drain plug gasket.
Lubricate the float bowl drain plug gasket with petroleum jelly.
Reinstall the float bowl drain plug.
Remove the float bowl screws and pull the float bowl off.
Remove the float bowl gasket.
Pull out the float pin and remove the float and needle valve.
Pry out the main jet.
Remove the retainer and O-ring from the outlet port.
Remove the air cleaner gasket from the carburetor.
Clean all carburetor parts using carburetor cleaner.
Spray carburetor cleaner through all openings in the carburetor.
Use small-gauge wire to clean all jet openings.
Carefully blow canned air or compressed air through all openings to remove residue.
Wipe down all parts with the shop rag.
Install the new O-ring in the outlet port and reinstall the retainer.
Replace the O-ring at the bottom of the main jet.
Reinstall the main jet.
Insert the new needle valve and new float pin in the float and reinstall the float on the float bracket.
Carefully install the float bowl gasket by pushing it into the channel on one side of the bowl and holding it with your finger. Stretch the gasket beyond the lip of the bowl and work it into the channel without rolling the gasket over.
Lightly lubricate the gasket using petroleum jelly.
Reinstall the float bowl and secure it with the mounting screws.
Install the new choke return spring.
Warning: Rolling the float bowl gasket into the lip channel can cause fuel to leak through the gap between the float bowl and carburetor body.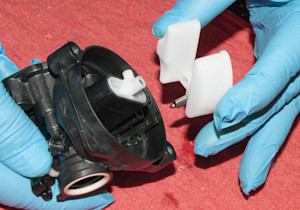
PHOTO: Reinstall the float bowl.
- 07.
Reinstall the carburetor
Connect the fuel line to the carburetor and secure it with the spring clamp.
Hold the carburetor over the mounting bracket and connect the governor and choke linkage rods.
Push the carburetor into the bracket arms and push the outlet port fully onto the carburetor adapter.
Push the new air cleaner gasket into the channel on the carburetor inlet.
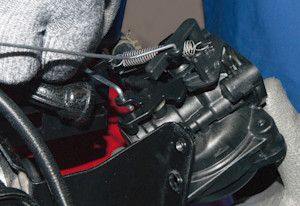
PHOTO: Reinstall the carburetor.
- 08.
Reinstall the blower housing
Position the blower housing on the top of the engine and line up the mounting holes.
Reinstall the blower housing mounting screws.
Reconnect the starter rope to the mower handle.
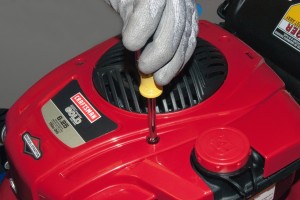
PHOTO: Reinstall the blower housing.
- 09.
Reconnect the fuel line to the tank
Push the fuel line onto the tank fitting and secure it with the spring clamp.
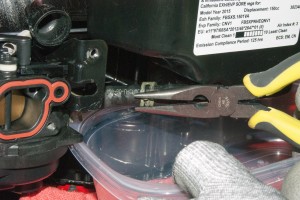
PHOTO: Reconnect the fuel line to the tank.
- 10.
Reinstall the air filter housing
Position the air filter base on the front of the carburetor and reconnect the breather tube.
Secure the air filter base with the mounting screws.
Reinstall the air filter.
Position the air filter cover on the front of the base and snap it into place, engaging the locking tab.
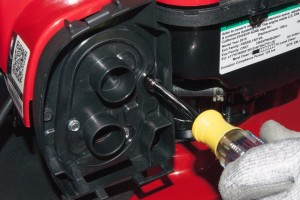
PHOTO: Reinstall the air filter base.
- 11.
Reconnect the spark plug wire
Push the spark plug wire back onto the spark plug.
Symptoms for gas walk-behind mowers
Choose a symptom to see related walk-behind mower repairs.
Main causes: damaged cutting blade, loose cutting blade, damaged flywheel key, engine needs tune up…
Main causes: uneven wheel height settings, damaged wheel, dull or damaged cutting blade…
Main causes: engine needs tune up, dirty or clogged carburetor, damaged flywheel key…
Main causes: drive control cable failure, worn or broken drive belt, bad transmission, broken drive wheel…
Main causes: stale gas, engine needs tune up, bad spark plug, dead battery, bad recoil starter, faulty safety switch, ba…
Main causes: dirty carburetor, bad spark plug, clogged air filter, engine choke problems, clogged gas cap vent…
Repair guides for gas walk-behind mowers
These step-by-step repair guides will help you safely fix what’s broken on your walk-behind lawn mower.
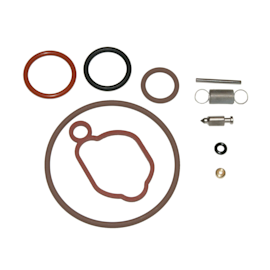
How to rebuild a lawn mower carburetor
The carburetor mixes air with fuel to drive the piston. Rebuild the carburetor if it's clogged or leaks.…
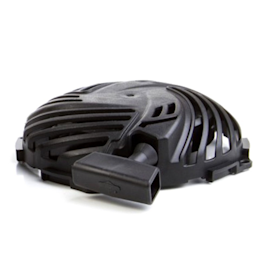
How to replace a lawn mower recoil starter on an OHV engine
Replace the recoil starter if it doesn't move when you pull the starter rope.…

How to replace a lawn mower wheel
Learn how replace a damaged wheel on a walk-behind lawn mower—it's a quick, easy fix.…
Effective articles & videos to help repair your walk-behind mowers
Use the advice and tips in these articles and videos to get the most out of your walk-behind lawn mower.

Learn about all the convenient features on our Sears PartsDirect website that make your parts purchases easier.…

Get answers to frequently asked questions about Sears and Sears PartsDirect.…

Learn about the different kinds of mower blades and how to maintain them.…