- Kenmore refrigerator water filters
- Whirlpool refrigerator water filters
- Samsung refrigerator water filters
- GE refrigerator water filters
- LG refrigerator water filters
- Frigidaire refrigerator water filters
- KitchenAid refrigerator water filters
- Maytag refrigerator water filters
- Kenmore Elite refrigerator water filters
- Estate refrigerator water filters
- GE Profile refrigerator water filters
- Amana refrigerator water filters
- Bosch refrigerator water filters
- Dacor refrigerator water filters
- Electrolux refrigerator water filters
How to replace a range surface element control switch
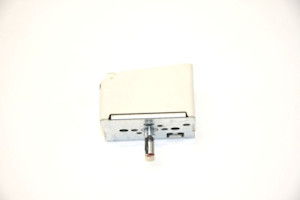
This range repair guide explains how to replace the surface element control switch. The surface element control switch—also called a surface burner switch or infinite switch—turns the associated surface element on and off, and controls the heat level for the surface element. Replace the surface element switch with a manufacturer-approved replacement part if you can't turn the element on or off, or can't set the heat level (assuming the surface element and the wiring both function correctly).
Follow the steps in the guide and video to replace the surface element control switch in Kenmore, Frigidaire, Electrolux, GE, Whirlpool, Maytag, Amana, Bosch, LG and Samsung ranges.
Quick links
Video
Instructions
Tools required
1/4-inch nut driver
Screwdriver
Work gloves
Cardboard to protect flooring
A helper if neccessary
Repair difficulty
Time required
15 minutes or less
Repair difficulty
Time required
15 minutes or less
How to replace a range surface element control switch video.
Replacing a range surface element control switch repair guide video.
Instructions
- 01.
Unplug the range
Set cardboard on the floor in front of the range to prevent scratching the flooring. Pull the range out of the cabinet and unplug the power cord. Use a helper if necessary.
- 02.
Remove the control panel back shield
Remove the screws from the control panel back shield and pull it off the range.
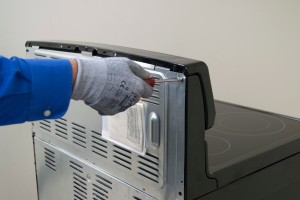
PHOTO: Remove the back shield screws.
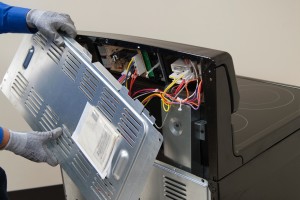
PHOTO: Remove the back shield.
- 03.
Replace the surface element control switch
Pull off the control knob.
Remove the screws that attach the surface element control switch to the control panel.
Pull the surface element control switch out and transfer the wires from the existing surface element control switch to the new surface element control switch.
Insert the new surface element control switch in the control panel and secure it with the mounting screws.
Push the control knob onto the surface element control switch stem.
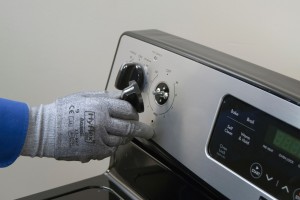
PHOTO: Pull off the control knob.
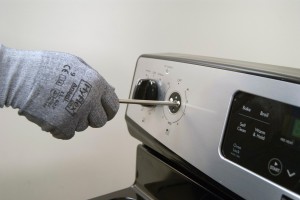
PHOTO: Remove the screws.
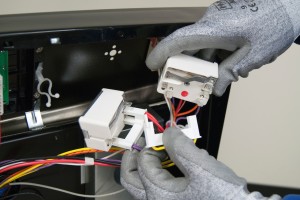
PHOTO: Transfer the wires.
- 04.
Reinstall the control panel back shield
Place the control panel back shield on the back of the control console and fasten the back shield with the mounting screws.
- 05.
Restore power and reinstall the range
Plug the power cord into the electrical outlet.
Carefully slide the range back into the cabinet, ensuring that the rear leveling foot properly engages with the anti-tip bracket so the range doesn’t fall forward when you open the oven door and pull out a loaded oven rack. Use a helper if necessary.
Warning: Undertaking repairs to appliances can be hazardous. Use the proper tools and safety equipment noted in the guide and follow all instructions. Do not proceed until you are confident that you understand all of the steps and are capable of completing the repair. Some repairs should only be performed by a qualified technician.
Most common symptoms to help you fix your ranges
Choose a symptom to see related range repairs.
Main causes: broken oven door lock assembly, wiring failure, electronic control board problem…
Main causes: broken broiler element, weak or broken broil burner igniter, control system failure, faulty temperature sen…
Main causes: power supply problem, control thermostat or electronic control board failure, broken element, bad burner ig…
Main causes: bad bake element, broken burner igniter, control system failure, blown thermal fuse, faulty temperature sen…
Main causes: food splatters, spilling food on the oven door, allowing liquid to drip through oven door vent when cleanin…
Main causes: faulty temperature sensor, electronic control board problem, control thermostat failure, weak burner ignite…
Main causes: power supply failure, blown thermal fuse, bad relay control board, damaged terminal block, wiring failure…
Most common repair guides to help fix your ranges
These step-by-step repair guides will help you safely fix what’s broken on your range.

How to replace a range oven door switch
The oven door switch detects whether the oven door is closed and helps control the oven light. Replace the switch if it …
Repair difficulty
Time required
30 minutes or less
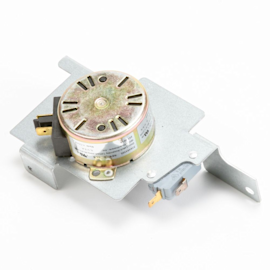
How to replace a range oven door lock assembly
Oven door not locking? You can replace the lock assembly in less than 30 minutes. Here's how.…
Repair difficulty
Time required
15 minutes or less
Effective articles & videos to help repair your ranges
Use the advice and tips in these articles and videos to get the most out of your range.

Learn how to clean and maintain your stove to keep it in top shape.…

Learn about all the convenient features on our Sears PartsDirect website that make your parts purchases easier.…

Get answers to frequently asked questions about Sears and Sears PartsDirect.…
