- Kenmore refrigerator water filters
- Whirlpool refrigerator water filters
- Samsung refrigerator water filters
- GE refrigerator water filters
- LG refrigerator water filters
- Frigidaire refrigerator water filters
- KitchenAid refrigerator water filters
- Maytag refrigerator water filters
- Kenmore Elite refrigerator water filters
- Estate refrigerator water filters
- GE Profile refrigerator water filters
- Amana refrigerator water filters
- Bosch refrigerator water filters
- Dacor refrigerator water filters
- Electrolux refrigerator water filters
No hot water: electric water heater troubleshooting video
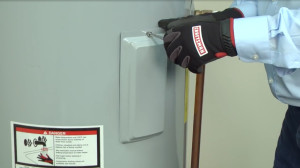

There are a number of issues that could be to blame when your electric water heater isn't heating. You could have an issue with your power supply or a break in the wiring. One of the two heating elements could be broken, causing your hot water to run out faster than it should. Or your water heater could have a broken thermostat.
This video from Sears PartsDirect will show you how to safely check continuity on the various parts and wires inside your water heater so that you can find the correct part to get your system up and running.
For more water heater repair troubleshooting tips and repair guides, check out water heater repair page. Get replacement water heater parts at Sears PartsDirect.
Tools and parts needed
Multimeter
Hand tools
Work gloves
Make sure the water heater has power
Hi. This is Wayne from Sears PartsDirect. Today we're going to give you some troubleshooting tips to repair an electric water heater that is not heating.
Of course, the first thing to check is the power source. An electric water heater needs 240 volts of power to heat water.
Check both house circuit breakers for the water heater. It's often hard to spot a tripped breaker. We recommend that you shut off both breakers for the water heater and then turn them back on.
If a breaker was tripped, this will reset it. This will likely restore power, unless you have a problem with the electrical supply itself, which should be addressed by a qualified electrician.
If you reset the circuit breakers and they immediately trip again, then you likely have a broken and shorted heating element. Click to 2:25 in this video for the section about checking the heating system inside the water heater.
If your circuit breakers don’t trip right after you reset them, wait 30 minutes for your water heater to recover and check for hot water.
Reset the high-temperature limit switch
If you’re still not getting any hot water, you may need to reset the high-temperature limit switch on the upper thermostat. You won't get any hot water if that limit switch is tripped.
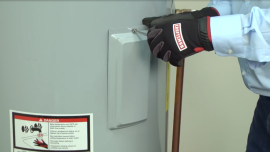
Shut off the house circuit breakers for your water heater. Remove the upper heating element cover to access the high-temperature limit switch. Press the red button on the switch to reset it, then reinstall the cover. Turn the circuit breakers back on and check to see if the water heater is heating normally.
Even if resetting the limit switch solves your problem, you may not be out the woods yet. You'll need to monitor your water temperature for overheating. The high-temperature limit switch tripped for a reason, likely because you have a shorted heating element or defective thermostat causing the water to overheat. You'll need to resolve overheating problems to prevent scalding. Water temperature should never exceed 120 degrees. If the water overheats after resetting the high-temperature limit switch, view this video for troubleshooting tips to resolve that problem.
Check the power supply wiring
So far, we've tried resetting the circuit breakers and resetting the high-temperature limit switch on the water heater. If you're still not getting any hot water, we'll need to check the power supply wiring.
Shut off the house circuit breakers for your water heater. Make sure you cut off the correct circuit breakers for the water heater. If the power is connected, it could shock or kill.
Remove the cover to the junction box that houses the power supply wiring. Make sure that none of the wires are loose and all wire nuts are tight enough to make secure connections. Reconnect any loose wires then reinstall the cover. Turn on the house circuit breakers and check to see if you’re getting any hot water now.
Test for a short circuit
If that didn’t solve the problem, we'll need to check the heating system inside your water heater. For this test, we'll be using a multimeter to check for continuity, which will confirm that power is making it to all of the internal components.
Shut off the house circuit breaker for the water heater before performing these checks. Never attempt to check continuity with the power connected. First we’ll check for a short circuit to the water heater cabinet. You’ll want to check this, especially if your circuit breaker trips as soon as you reset it. Access the power supply wiring again.
Remove the wire nuts to access the water heater supply wires, which will lead directly in to the water heater cabinet. Set the multi-meter to measure ohms of resistance. Measure the resistance from the black wire to the bare metal on the junction box. Repeat the same test with the red wire.
You should see a 1 appear in the far left corner of the meter during these short circuit tests, indicating no continuity. If you measure a resistance reading during this test, then damaged wiring or a broken electrical part is touching the metal cabinet and causing the short circuit.
Do not restore power to the water heater until you find and repair the damaged wire or the broken electrical part. A short circuit can shock you if you touch the metal cabinet with the power connected.
Check the upper heating system
Next, we'll check the upper element heating system, by measuring the resistance through the supply wiring.
The upper element heating system consists of the hi-temperature limit switch, the upper thermostat, the upper heating element and the wires that connect those electrical parts. Since all of these components create a complete circuit, if we don't have continuity here, we’ll know that the problem is in the upper half of the water heater.
Touch one meter probe to the black wire and the other probe to the red wire. You should measure around 13 ohms of resistance through the upper element heating system. If you measure 13 ohms of resistance, then your upper element heating system is probably okay. Click here to skip ahead and check the lower heating element system.
If you don't find continuity through the upper heating system, we'll need to check the individual parts to find the break.
With the power still disconnected, remove the upper heating element cover and check the resistance for the upper heating element. Place one meter lead on each of the two screws. You should measure about 13 ohms of resistance.
If you measure no continuity, drain the tank and replace the broken heating element. Here's a video that will show you how.
If the heating element is okay, we'll check the upper thermostat next. This thermostat turns the upper heating element on and off to maintain hot water temperature. An electrical switch inside the thermostat activates the element. If the switch is broken, the element won't heat. At room temperature, the switch should be on to supply power to the heating element. Refer to a wiring diagram for your water heater to determine which terminals to check. Many water heaters have a sticker on the cabinet or you can usually find one in your owner's manual.
On this water heater, the thermostat switch is between terminals 1 and 2. Touch one meter probe to terminal 1 and the other probe to terminal 2. You should measure near zero ohms of resistance. If you measure no continuity, then replace the thermostat. Here's a video that shows you how.
The last component in the upper element heating system to check is the hi-temperature limit switch. This wiring diagram shows us that the hi-temperature limit switch opens contacts between terminals 1 & 2 and between terminals 3 & 4 when it trips because the water is too hot. Touch one meter probe to terminal 1 and the other probe to terminal 2. You should measure near zero ohms of resistance. Repeat that process for terminals 3 & 4.
If you measure no continuity, then the hi-temperature limit switch is broken. You’ll need to replace the whole upper thermostat because the limit switch is part of the thermostat.
If you’ve checked all of the parts in the upper heating system and you still haven't found the break, then you know it’s got to be in the wiring. Carefully examine the wiring for loose connections. Reconnect any loose wires and repair any broken wires that you find.
Check the lower heating system
If your upper heating system is ok, then we'll check the lower heating system. According to our wiring diagram, we can check continuity through the entire lower heating system circuit by measuring resistance through terminal 4 on the upper thermostat and terminal 4 on the high-temperature limit switch.
Touch one meter probe to terminal 4 on the upper thermostat and the other meter probe to terminal 4 of the high-temperature limit switch. You should measure about 13 ohms of resistance through the whole lower element heating system; that lets you know all lower heating system components are working.
You've now eliminated all possible failures except one. The upper thermostat has a transfer switch, which alternates power between the upper heating element and the lower heating element so both heating elements in the tank never heat at the same time.
When the upper thermostat senses that water in the top of the tank is hot enough, the transfer switch shifts power from the upper system to the lower. If the transfer switch in the upper thermostat breaks, the lower heating element won't get power.
You’ll need to replace the whole upper thermostat because the transfer switch is a component of that part.
Now, if on the other hand, you measured an open circuit when checking the lower element heating system, then you'll need to check the individual parts of that system.
The lower heating system is similar to the upper, but only has a thermostat and a heating element. We'll check the lower heating element first.
With the power disconnected, access the lower heating element to check continuity. You should measure about 13 ohms of resistance. If you measure an open circuit, drain the tank and replace the heating element.
If the heating element is okay, we'll check the lower thermostat.
On the lower thermostat, there are only two terminals. Put the meter probes on either side. You should measure near zero ohms of resistance. If you measure an open circuit, then replace the thermostat.
Check for breaks in the wiring
If you can’t find any breaks in the lower heating system, then the problem has got to be in the wiring. You’ll need to repair it before the water heater will work correctly.
Well I hope this video helped you out today. Be sure to check out our other videos and if you like them, subscribe.
When you’re unable to fix a water heater problem yourself, trust us to diagnose and repair the issue for you. Sears Home Services repairs all types of water heaters. For example, if you find your AO Smith water heater not heating, we’ll fix the problem with original manufacturer replacement parts.
Symptoms for electric water heaters
Main causes: excessive tank sediment, high voltage supply…
Main causes: thermostats need adjustment, bad heating elements, faulty thermostats, tank sediment build-up, broken dip t…
Repair guides for electric water heaters
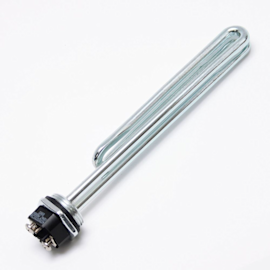
How to replace a water heater element
If your water heater runs out of hot water quickly and one of the two heating elements has failed, replace the element f…
Repair difficulty
Time required
30 minutes or less
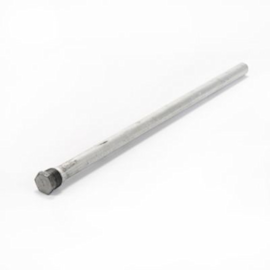
How to replace an electric water heater anode rod
If your hot water begins to smell like rotten eggs, replace the anode rod with a zinc-aluminum anode rod following the i…
Repair difficulty
Time required
15 minutes or less
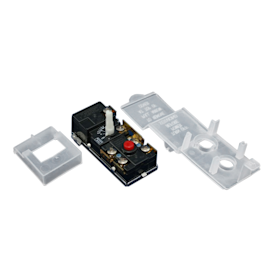
How to replace an electric water heater thermostat
If the water temperature fluctuates or you don't get enough hot water, follow these instructions to replace your water h…
Repair difficulty
Time required
30 minutes or less
Articles and videos for electric water heaters

Get answers to frequently asked questions about Sears and Sears PartsDirect.…
Learn how to troubleshoot issues when your electric water heater is not heating your water.…
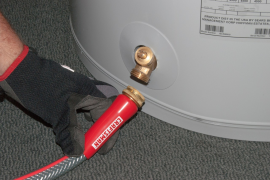
Find out how to drain the tank on your electric water heater.…