- Kenmore refrigerator water filters
- Whirlpool refrigerator water filters
- Samsung refrigerator water filters
- GE refrigerator water filters
- LG refrigerator water filters
- Frigidaire refrigerator water filters
- KitchenAid refrigerator water filters
- Maytag refrigerator water filters
- Kenmore Elite refrigerator water filters
- Estate refrigerator water filters
- GE Profile refrigerator water filters
- Amana refrigerator water filters
- Bosch refrigerator water filters
- Dacor refrigerator water filters
- Electrolux refrigerator water filters
Kenmore 111 model bottom-freezer refrigerator error codes

These error code explanations help troubleshoot a problem with your Kenmore bottom-freezer Trio refrigerator with a model number that starts with 111. When your refrigerator isn't working or it isn't cooling well, you may be able to find the cause of the problem by entering the diagnostic mode on the control to view the error codes. The error codes will likely point you in the direction of the failed component causing the cooling problem. Enter the diagnostic mode by pressing and holding the Lock button for 3 seconds, then press and hold the Freezer and Refrigerator buttons while pressing the Acela Ice button 5 times. The digital display will show operating time (number of minutes it's been plugged in). Press the Freezer button 6 times to step through temperature sensor checks. The display will then show time remaining until the next water filter change. Press the Freezer button 1 more time to see any error codes. The display just shows operating time if the control detects no problems resulting in error codes. If an error code displays, note the code and then continue to press the Freezer button to display any additional error codes. Operating time will display after you view the last error code. Press the Lock button to exit the diagnostic mode. Find the error codes in the chart below and repair the failures. The codes reset after you repair the failures.
For repair how-to help, visit the PartsDirect repair help section, which includes repair help for ranges, other major appliances, lawn and garden equipment, garage door openers, vacuum cleaners and more. Search for your model number to find a complete list of replacement parts for your refrigerator.
Error Code
Condition
DIY advice
F1 Lo or F1 Hi
Freezer compartment temperature sensor failure
Check/Repair
Unplug the refrigerator and check the freezer temperature sensor wiring connected to the control board for damage. Repair any broken wires. Measure the resistance through the freezer temperature sensor circuit from the control board. Replace the freezer temperature sensor if resistance isn't between 1,000 and 40,000 ohms.
Possible parts
Freezer temperature sensor
r1 Lo or r1 Hi
Refrigerator compartment temperature sensor failure
Check/Repair
Unplug the refrigerator and check the refrigerator temperature sensor wiring connected to the control board for damage. Repair any broken wires. Measure the resistance through the refrigerator temperature sensor circuit from the control board. Replace the refrigerator temperature sensor if resistance isn't between 8,000 and 40,000 ohms.
Possible parts
Refrigerator temperature sensor
i5 Lo or i5 Hi
Ice maker temperature sensor failure
Check/Repair
Unplug the refrigerator and check the ice maker temperature sensor wiring between the ice maker and control board for damage. Repair any broken wires. If you find no wiring problems, replace the ice maker because the ice maker sensor is a component of the ice maker and isn't available as a separate part.
Possible parts
Ice maker
FD Lo or FD Hi
Freezer defrost sensor failure
Check/Repair
Unplug the refrigerator and check the freezer defrost sensor wiring connected to the control board for damage. Repair any broken wires. Measure the resistance through the freezer defrost sensor circuit from the control board. Replace the freezer defrost sensor if resistance isn't between 8,000 and 40,000 ohms.
Possible parts
Freezer defrost sensor
rD Lo or rD Hi
Refrigerator defrost sensor failure
Check/Repair
Unplug the refrigerator and check the refrigerator defrost sensor wiring connected to the control board for damage. Repair any broken wires. Measure the resistance through the refrigerator defrost sensor circuit from the control board. Replace the refrigerator defrost sensor if resistance isn't between 8,000 and 40,000 ohms.
Possible parts
Refrigerator defrost sensor
iD Lo or iD Hi
Ice room temperature sensor failure
Check/Repair
Unplug the refrigerator and check the ice room temperature sensor wiring connected to the control board for damage. Repair any broken wires. Measure the resistance through the ice room temperature sensor circuit from the control board. Replace the ice room temperature sensor if resistance isn't between 1,000 and 40,000 ohms.
Possible parts
Ice room temperature sensor
rt Lo or rt Hi
Ambient temperature sensor failure
Check/Repair
Unplug the refrigerator and check the ambient temperature sensor wiring connected to the control board for damage. Repair any broken wires. Measure the resistance through the ambient temperature sensor circuit from the control board. Replace the ambient temperature sensor if resistance isn't between 1,000 and 40,000 ohms.
Possible parts
Ambient temperature sensor
dr
Refrigerator door switch defective
Check/Repair
The control displays dr when it detects a refrigerator door open for more than 1 hour. Close the refrigerator door if open. If you find both doors shut, unplug the refrigerator and check the door switch wiring connected to the control board for damage. Repair any broken wires. Measure the resistance through each door switch from the control board with both doors closed. You should measure near zero ohms of resistance through both door switches. If you measure infinite resistance through a door switch, replace it.
Possible parts
Refrigerator door switch
dF
Freezer door switch defective
Check/Repair
The control displays dF when it detects the freezer door open for more than 1 hour. Close the freezer door if open. If you find the door shut, unplug the refrigerator and check the door switch wiring connected to the control board for damage. Repair any broken wires. Measure the resistance through the freezer door switch from the control board with the door closed. You should measure near zero ohms of resistance through the freezer door switch. If you measure infinite resistance through the door switch, replace it.
Possible parts
Freezer door switch
C1
Sealed refrigerant system failure
Check/Repair
The control detects low refrigerant charge or a defective compressor. A refrigerator service technician will need to complete this repair because it involves the recovery and recharge of refrigerant (Freon).
Possible parts
Compressor
F3
Freezer defrost heater failure
Check/Repair
Unplug the refrigerator and check the freezer defrost heater wiring for damage. Repair any broken wires. If the wires are okay, replace the freezer defrost heater.
Possible parts
Freezer defrost heater
r3
Refrigerator defrost heater failure
Check/Repair
Unplug the refrigerator and check the refrigerator defrost heater wiring for damage. Repair any broken wires. If the wires are okay, replace the refrigerator defrost heater.
Possible parts
Refrigerator defrost heater
ES
Dispenser failure
Check/Repair
Check the display panel. If you see the indicator light toggling through the Water, Crushed Ice and Cubed Ice selections then the Water/Ice button is stuck. Press the Water/Ice button in various spots to free the stuck button. If you can't free the stuck button, replace the user interface board.
Possible parts
User interface board
d2
Forced defrost mode activated
Check/Repair
Indicates the refrigerator is in the forced defrost mode. The control terminates the forced defrost mode automatically when one of the evaporators reaches 55 degrees F. The refrigerator then returns to normal cooling.
Possible parts
Most common symptoms to help you fix your refrigerators
Choose a symptom to see related refrigerator repairs.
Main causes: blocked vents, defrost system problems, evaporator fan failure, dirty condenser coils, bad sensors, condens…
Main causes: damaged door seal, faulty defrost sensor or bi-metal thermostat, broken defrost heater, bad defrost timer o…
Main causes: jammed ice cubes, broken ice maker assembly, dirty water filter, kinked water line, bad water valve, freeze…
Main causes: control board or cold control failure, broken compressor start relay, compressor motor failure, defrost tim…
Main causes: leaky door gasket, defrost system failure, evaporator fan not running, dirty condenser coils, condenser fan…
Main causes: blocked air vents, compressor problems, condenser or evaporator fan not working, control system failure, se…
Main causes: water valve leaking, frozen or broken defrost drain tube, overflowing drain pan, cracked water system tubin…
Things to do: clean condenser coils, replace the water filter, clean the interior, adjust doors to prevent air leaks, cl…
Most common repair guides to help fix your refrigerators
These step-by-step repair guides will help you safely fix what’s broken on your refrigerator.

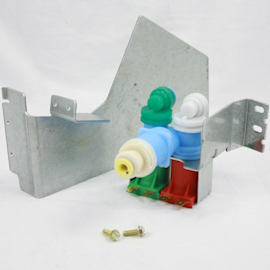
How to replace a refrigerator water valve
Replace the water valve that feeds water to the ice maker and water dispenser if it no longer controls the flow of water…
Repair difficulty
Time required
15 minutes or less

How to clean refrigerator condenser coils
Help your refrigerator run more efficiently by cleaning the condenser coils. It's easy and takes just a few minutes.…
Repair difficulty
Time required
15 minutes or less

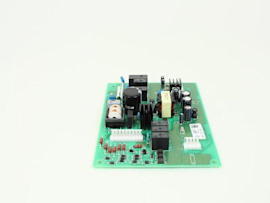
How to replace a refrigerator temperature control board
If the temperature in your refrigerator doesn't match the temperature you set, the problem could be the temperature cont…
Repair difficulty
Time required
30 minutes or less
Effective articles & videos to help repair your refrigerators
Use the advice and tips in these articles and videos to get the most out of your refrigerator.

No matter what style Maytag refrigerator you have, we can walk you through replacing the water filter.…

Learn about all the convenient features on our Sears PartsDirect website that make your parts purchases easier.…

If your refrigerator's ice maker isn't producing as much ice as it should, or water is flowing poorly from the dispenser…