- Kenmore refrigerator water filters
- Whirlpool refrigerator water filters
- Samsung refrigerator water filters
- GE refrigerator water filters
- LG refrigerator water filters
- Frigidaire refrigerator water filters
- KitchenAid refrigerator water filters
- Maytag refrigerator water filters
- Kenmore Elite refrigerator water filters
- Estate refrigerator water filters
- GE Profile refrigerator water filters
- Amana refrigerator water filters
- Bosch refrigerator water filters
- Dacor refrigerator water filters
- Electrolux refrigerator water filters
How to replace a belt-drive garage door opener motor
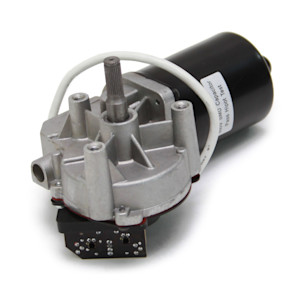
This DIY repair guide explains how to replace the motor on a belt-drive garage door opener. The motor spins the pulley that moves the trolley to raise and lower the door. If the motor won't work at all when activated, replace it with the manufacturer-approved replacement part.
This guide shows how to replace the motor in Craftsman, LiftMaster and Chamberlain belt-drive garage door openers.
Quick links
Video
Instructions
Tools required
Step ladder
Socket wrench set
Phillips screwdriver
Slot screwdriver
Wrench set
Channel-lock pliers
General-purpose grease
Work gloves
Work table
Repair difficulty
Time required
60 minutes or less
Repair difficulty
Time required
60 minutes or less
Replacing the motor on a belt-drive garage door opener
This video explains how to replace the motor on a belt-drive garage door opener.
Instructions
- 01.
Disconnect power
Use a step ladder to access the garage door opener’s power cord and motor unit.
Unplug the garage door opener.
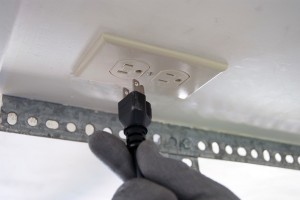
PHOTO: Unplug the garage door opener.
- 02.
Take the garage door opener down
Pull the emergency release rope to release the trolley from the garage door.
Shut the garage door if it's not already closed.
Remove the fastener ring from the straight door arm connected to the outer trolley.
Pull out the clevis pin while supporting the straight arm to disconnect the garage door from the outer trolley.
Lower the straight and curved arms and rest them against the garage door.
Open the light cover to access the wall control and safety sensor wires connected to the motor unit.
Take a digital photo of the wall control and safety sensor wires connected to the motor unit. You’ll refer to the photo later when reconnecting the wires.
Disconnect the wall control and safety sensor wires from the motor unit.
Close the light cover.
Remove the nuts, bolts, and lock washers that secure the motor unit to the ceiling bracket. Support the motor unit with one hand as you remove the last bolt from the ceiling bracket.
Carefully lower the motor unit down and rest it securely on top of the step ladder.
Climb down the step ladder and lower the motor unit down, resting the motor unit on your work table.
Move your step ladder by the garage door so you can remove the rail from the header bracket.
Remove the fastener ring from the header bracket clevis pin.
Pull the clevis pin out of the rail and header bracket while supporting the rail with one hand.
Lower the rail and rest it on a rung of the step ladder so the rail is level with the motor unit on your work table.
Tip: You may want to have a helper assist you when taking the garage door opener down.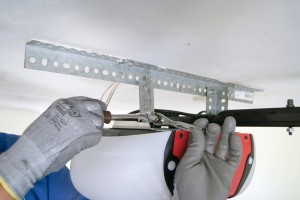
PHOTO: Take down the garage door opener.
- 03.
Release the belt
Slide the outer trolley away from the inner trolley.
Loose the spring nut to relieve belt tension.
Using channel-lock pliers, carefully squeeze the spring on the spring nut and trolley shaft to create slack in the belt.
Unhook the trolley connector from the front of the trolley and then release the spring tension.
Remove the screws from the belt cap on the motor unit and pull the belt cap off.
Release the belt from the motor pulley.
Warning: The spring nut is under heavy tension. Use care when compressing the spring to avoid injury.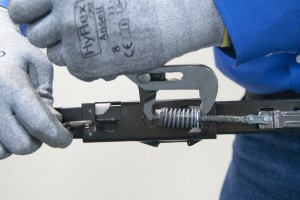
PHOTO: Release the belt.
- 04.
Remove the motor
Remove the light covers and light bulbs from the motor unit.
Remove the battery cover screw and then take off the battery cover.
Pull the battery out and disconnect the battery wires.
Remove the retainer clip from the motor pulley and pull off the motor pulley.
Remove the screws from the motor unit cover and pull off the motor unit cover.
Remove the motor mounting screws, supporting the motor with your hand as you remove the last screw.
While still supporting the motor, carefully flip the motor unit over.
Disconnect the motor wire harness from the logic board.
Unplug the wire harness from the RPM sensor.
Pull the motor out.
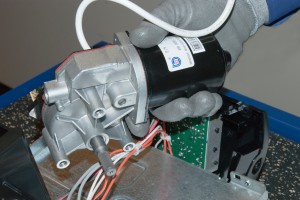
PHOTO: Remove the motor.
- 05.
Install the new motor
Position the new motor in the motor unit.
Plug in the RPM sensor wire harness.
Plug the motor wire harness into the logic board.
Connect the motor wire harness to the other wires inside the motor unit using a cable tie.
While supporting the motor with one hand, carefully flip the motor unit over.
While still supporting the motor unit, install the motor mounting screws.
Reinstall the motor unit cover, securing it with the mounting screws.
Install the motor pulley and secure it with the retainer clip.
Connect the wires to the battery and insert the battery into the battery box.
Reinstall the battery cover and secure it with the mounting screw.
Reinstall the light bulbs and light covers.
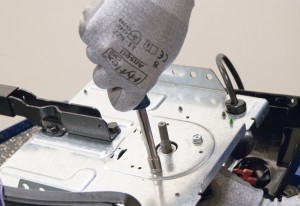
PHOTO: Install the new motor.
- 06.
Reinstall the belt
Route the belt around the motor pulley and reinstall the belt cap, securing it with the mounting screws.
Align the belt along the rail and hold the trolley connector next to the inner trolley.
Using channel-lock pliers, compress the spring on the spring nut and trolley shaft to create slack in the belt then hook the trolley connector to the front of the trolley.
Slowly release the spring.
Tighten the spring nut to tension the belt.
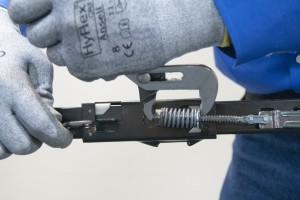
PHOTO: Reconnect the belt.
- 07.
Reinstall the garage door opener
Reconnect the rail end to the header bracket using the clevis pin and fastener ring.
Position your step ladder under the motor unit ceiling bracket and carefully set the motor unit on top of the step ladder.
Climb the step ladder and reinstall the motor unit to the ceiling bracket using the nuts, bolts and lock washers.
Open the light cover to access the wall control and safety sensor terminals on the motor unit.
Using your digital photo for reference, reconnect the wall control and safety sensor wires to the motor unit.
Close the light cover.
Reconnect the straight door arm to the outer trolley using the clevis pin and fastener ring.
Re-engage the trolley.
Tip: Reconnect the curved door arm to the straight door arm using the bolts, lock washers and nut if you disconnected the curved arm from the straight arm when freeing the garage door from the outer trolley.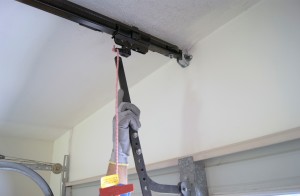
PHOTO: Reconnect the door to the trolley.
- 08.
Reconnect electrical power
Plug in the garage door opener.
- 09.
Set the travel limits
Press and hold the black adjustment button until the up button flashes.
Push and hold the up button until the door reaches the desired up position. Toggle the up and down buttons if necessary to achieve the desired up position.
Press and release the black adjustment button to set the up position.
The garage door opener lights will flash twice to indicate that the up position is set, and the down button then flash.
Press and hold the down button until the door is in the desired down position, toggling the up and down buttons as necessary to achieve the desired down position.
Press and release the black adjustment button.
The garage door opener lights will flash twice and the up button will then flash.
Press the up button and the door will move to the programmed up position. Then, the down button will flash.
Press the down button and the door will move to the programmed down position.
The programming is complete.
Warning: Undertaking repairs or maintenance to appliances or power equipment can be hazardous. Should you choose to undertake repairs or maintenance, you are assuming the risk of injury to your person or property. In an effort to reduce the risk, use the proper tools and safety equipment noted in the applicable guide and follow all instructions. Do not proceed until you are confident that you understand all of the steps and are capable of completing the repair. Some repairs or maintenance, however, should only be performed by a qualified technician.
Most common symptoms to help you fix your garage door openers
Choose a symptom to see related garage door opener repairs.
Main causes: faulty logic control board, bad RPM sensor, broken gears in the drive system, bad drive motor…
Main causes: radio interference, weak remote batteries, sunlight interference with safety sensor beams, safety sensors n…
Things to do: check garage door travel, tighten brackets and fasteners, test safety sensors, check travel limits and for…
Main causes: garage door locked, damaged garage door tracks, up-force setting needs adjustment, RPM sensor failure, bad …
Main causes: neighbor's remote programmed at the same time as yours, faulty wall control wiring, bad wall control unit…
Main causes: garage door opener misaligned, travel limits need adjustment, bad travel limit switches, faulty logic contr…
Main causes: safety sensor beams blocked, safety sensors not aligned, downforce setting needs adjustment, damaged garage…
Main causes: loose fasteners, broken brackets, need preventive maintenance, worn drive gears, loose or worn belt, loose …
Most common repair guides to help fix your garage door openers
These step-by-step repair guides will help you safely fix what’s broken on your garage door opener.
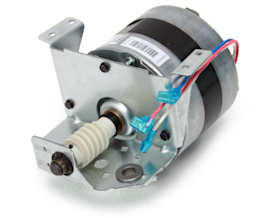
How to replace a chain-drive garage door opener motor
Get your garage door moving again by replacing a defective motor in your garage door opener.…
Repair difficulty
Time required
60 minutes or less
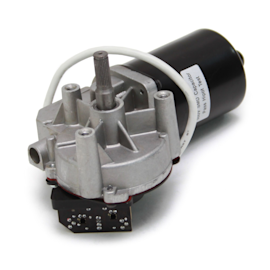
How to replace a belt-drive garage door opener motor
The garage door won't move if the motor is defective. Here’s how to fix it.…
Repair difficulty
Time required
60 minutes or less
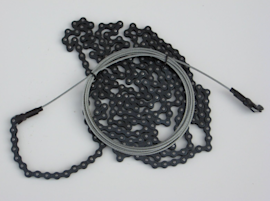
How to replace a garage door opener drive chain and cable assembly
If your garage door won’t move, the chain and cable assembly on your garage door opener could be broken. Follow these st…
Repair difficulty
Time required
60 minutes or less
Effective articles & videos to help repair your garage door openers
Use the advice and tips in these articles and videos to get the most out of your garage door opener.

Learn about all the convenient features on our Sears PartsDirect website that make your parts purchases easier.…

Get answers to frequently asked questions about Sears and Sears PartsDirect.…
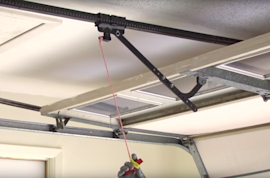
Learn how to open a garage door manually if power to your garage door opener fails.…
