- Kenmore refrigerator water filters
- Whirlpool refrigerator water filters
- Samsung refrigerator water filters
- GE refrigerator water filters
- LG refrigerator water filters
- Frigidaire refrigerator water filters
- KitchenAid refrigerator water filters
- Maytag refrigerator water filters
- Kenmore Elite refrigerator water filters
- Estate refrigerator water filters
- GE Profile refrigerator water filters
- Amana refrigerator water filters
- Bosch refrigerator water filters
- Dacor refrigerator water filters
- Electrolux refrigerator water filters
How to replace a wall oven control thermostat

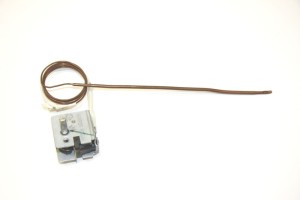
This wall oven repair guide gives step-by-step instructions for replacing the oven temperature control thermostat. The thermostat is the switch in the control panel that lets you set the oven heat. If the oven control thermostat fails, the temperature in the oven will be too hot or not hot enough. Replace a broken oven control thermostat using a manufacturer-approved replacement part.
Use these steps to replace the oven control thermostat in common Kenmore, Frigidaire, Whirlpool, KitchenAid, Amana, Maytag, Electrolux, GE and Magic Chef wall ovens.
Quick links
Instructions
Tools required
Needle-nose pliers
Phillips screwdriver
Work gloves
Repair difficulty
Time required
60 minutes or less
Repair difficulty
Time required
60 minutes or less
Instructions
- 01.
Disconnect electrical power
Shut off the house circuit breakers for the wall oven to completely disconnect electrical power.
- 02.
Remove the mounting screws from the thermostat
Pull the control knob you use to set the oven temperature straight off its stem. Use a Phillips screwdriver to remove the 2 mounting screws on either side of the stem.
- 03.
Remove the wall oven from the cabinet
Set a sturdy work table or platform just in front of the oven and pad the surface of the table with a towel or cardboard to protect the table.
Open the oven door and remove the mounting screws that secure the oven to the sides of the oven cabinet. Slide the oven forward in the cabinet. You should have enough slack in the electrical conduit of the power supply; if not disconnect the power supply wiring from the junction box for the wall oven.
With someone's help, carefully lift the oven out of the cabinet and set it on the table in front of the cabinet.
Tip: Use the installation manual for your wall oven to guide you in this step. - 04.
Disconnect the oven control thermostat
Remove the mounting screws holding the top panel that's above the oven controls, just behind the control panel.
Take a digital photograph or mark the wires with labeled masking tape to document how the wires connect to the oven control thermostat, so you can properly connect the new oven control thermostat.
You should have enough slack in the wires to pull the oven control thermostat out of the back of the control panel. Use a pair of needle-nose pliers to pull the female spade connectors off of the male spade leads on the existing oven control thermostat.
- 05.
Remove the thermostat
Remove the outer back panel of the oven.
Inside the oven, release the oven sensor bulb and sensor tube from the bracket at the back of the inside of the oven. Push the sensor bulb and tube out of the hole in the back of the oven. From behind the oven, pull the sensor bulb and tube completely out of the oven.
Remove the thermostat.
- 06.
Position the new thermostat
Position the new oven control thermostat in the control panel. Thread the sensor bulb from the control panel area to inside of the oven. Clip the new oven sensor bulb and tube into the mounting bracket.
- 07.
Connect the thermostat
Properly connect the wires to the new oven control thermostat.
Push the stem of the oven control thermostat through the front of the control panel. Line up the mounting screw holes, insert the mounting screws and tighten them firmly.
- 08.
Reinstall the oven
With someone's help, lift the oven into the cabinet. Reinstall the mounting screws on the sides of the oven cabinet that hold the oven in place.
- 09.
Reattach the control knob
Push the control knob onto the stem of the new oven control thermostat.
- 10.
Turn on power to the oven
Reset the house circuit breakers for the oven to restore electrical power.
Warning: Undertaking repairs to appliances can be hazardous. Use the proper tools and safety equipment noted in the guide and follow all instructions. Do not proceed until you are confident that you understand all of the steps and are capable of completing the repair. Some repairs should only be performed by a qualified technician.
Most common symptoms to help you fix your wall oven
Choose a symptom to see related wall oven repairs.
Main causes: faulty oven temperature sensor, control system problem, weak burner igniter, damaged oven element…
Main causes: broken bake element, bad bake burner igniter, tripped thermal switch, control system failure…
Main causes: broken broil element, faulty broil burner igniter, control system failure…
Main causes: bad oven door lock assembly, faulty electronic control board, wiring failure…
Main causes: lack of gas supply, broken igniter, tripped circuit breaker, broken oven element, tripped thermal fuse, con…
Main causes: lack of electrical power, bad electronic control board, faulty oven control thermostat…
Most common repair guides to help fix your wall oven
These step-by-step repair guides will help you safely fix what’s broken on your wall oven.

How to replace a wall oven thermal fuse
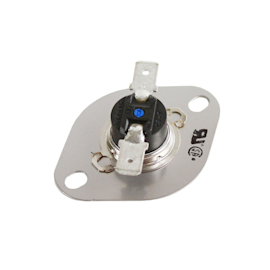
The thermal fuse trips to prevent the over from excessively overheating. The oven won't heat again until you replace the…
Repair difficulty
Time required
60 minutes or less

How to replace a wall oven control thermostat
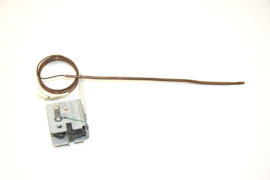
Get your oven temperature under your control by replacing a faulty oven control thermostat.…
Repair difficulty
Time required
60 minutes or less

How to replace a wall oven door outer glass panel
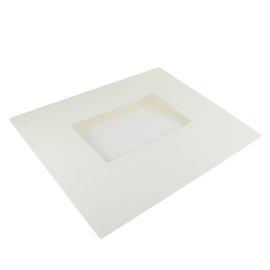
Learn how to replace a damaged outer window panel on your wall oven door with these step-by-step instructions. …
Repair difficulty
Time required
45 minutes or less
Effective articles & videos to help repair your wall oven
Use the advice and tips in these articles and videos to get the most out of your wall oven.

Get tips on completing essential holiday cleaning tasks to brighten your home.…

Learn about all the convenient features on our Sears PartsDirect website that make your parts purchases easier.…

Get answers to frequently asked questions about Sears and Sears PartsDirect.…
