Stand Mixer: Why do the stand mixer attachments rub the bottom of the bowl?
You'll likely need to adjust the attachment clearance setting when attachments rub the bottom of the mixing bowl.
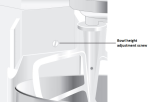
To adjust attachment clearance on common KitchenAid mixers, turn the speed control off and unplug the stand mixer. Tilt the motor head up and install the flat beater. To raise the flat beater, use a slot screwdriver to turn the attachment adjustment screw (located at the hinge point) 1/8th of a revolution counterclockwise. Lower the motor head and check the flat beater's clearance. If the beater still touches the bottom of the mixing bowl, continue adjusting the clearance setting 1/8th turn until the flat beater just clears the bottom of the mixing bowl. Plug in the power cord and turn on the mixer to check beater clearance while spinning. If the flat beater strikes the bottom of the mixing bowl while turning, turn off the mixer, unplug the power cord and continue to adjust the screw and check beater clearance until the flat beater no longer strikes the bottom of the mixing bowl while spinning.
If you have a different type of mixer, follow the instructions in your owner's manual to adjust the attachment clearance setting.

THESE REPAIRS MAY HELP SOLVE YOUR STAND MIXER PROBLEM

Adjust the stand mixer beater to bowl clearance
To adjust the clearance between the beater and bowl, rotate the slotted adjustment screw clockwise slightly to lower the beater and motor head. Turn the screw counterclockwise slightly to raise the beater and motor head.
Adjust the stand mixer beater to bowl clearance
Most common symptoms to help you fix your stand mixers
Choose a symptom to see related stand mixer repairs.
Main causes: phase control board failure, wiring connection problem, faulty electronic control board…
Main cause: worn carbon motor brushes…
Main cause: attachment clearance setting needs adjustment…
Main causes: bad wiring connections, faulty speed control plate, electronic control board failure…
Main causes: bad lubricating grease, mixer sitting idle for weeks at a time, mixer running constantly for more than 30 m…
Main causes: bad worm gear, damaged planetary gear assembly…
Main causes: lack of electrical power, wiring failure, worn carbon motor brushes, bad drive motor, tripped overload swit…
Most common repair guides to help fix your stand mixers
These step-by-step repair guides will help you safely fix what’s broken on your stand mixer.

How to replace a stand mixer worm gear
Here’s how to replace the worm gear in your stand mixer if it’s worn or damaged.…

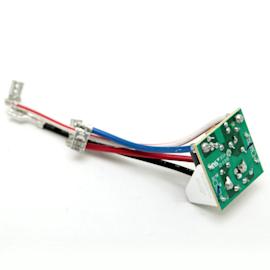
How to replace a stand mixer phase control board
The phase control board works with the governor and control plate to control motor speed. Replace the phase control boar…

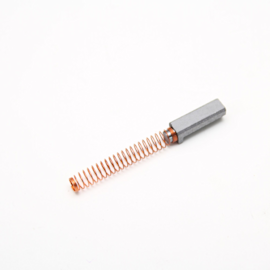
How to replace stand mixer motor brushes
If the carbon brushes are worn and damaged, replace them using these steps.…
Effective articles & videos to help repair your stand mixers
Use the advice and tips in these articles and videos to get the most out of your stand mixer.

Learn about all the convenient features on our Sears PartsDirect website that make your parts purchases easier.…

Find out five tips and techniques to help get the most out of your stand mixer.…

Learn about some easy stand mixer repairs you can do yourself.…