CONFIRM THE PART FITS
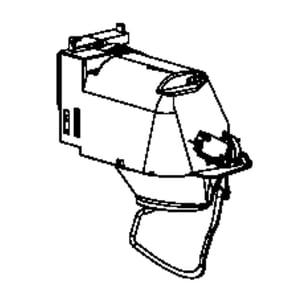
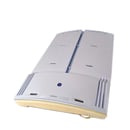
Refrigerator Dispenser Ice Chute Door and Funnel Assembly WR13X10735
Part #WR13X10735
Part Information
This dispenser ice chute door and funnel assembly (part number WR13X10735) is for refrigerators.
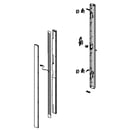
Dispenser ice chute door and funnel assembly WR13X10735 opens to let ice through when dispensing into a glass or other container. The assembly may include multiple parts; refer to your parts diagram for a complete list of parts included.
Unplug the refrigerator and safely store any food that could deteriorate while the power is off before installing this part. Wear work gloves to protect your hands.
Frequently Used Together
- $243.82 |5% OFF Phone Price : $255.82
- $64.22
- $54.99
- $168.57 |7% OFF Phone Price : $180.57
- $6.67 |13% OFF Phone Price : $7.67
- $14.09
- $180.85 |6% OFF Phone Price : $192.85
- $14.40 |12% OFF Phone Price : $16.40
- $47.55 |11% OFF Phone Price : $53.55
Top models using the same part
| Model Name | Model Number | Diagram Name |
|---|---|---|
| Model #PFSF6PKXGBB GE bottom-mount refrigerator | PFSF6PKXGBB | |
| Model #PFSF6PKXBWW GE bottom-mount refrigerator | PFSF6PKXBWW | Fresh food doors |
| Model #GFSF6PKBAWW GE bottom-mount refrigerator | GFSF6PKBAWW | |
| Model #PFSF6PKXDBB GE bottom-mount refrigerator | PFSF6PKXDBB | |
| Model #GFSF6PKBABB GE bottom-mount refrigerator | GFSF6PKBABB | |
| Model #PFSF6PKXDWW GE bottom-mount refrigerator | PFSF6PKXDWW | |
| Model #GFSF6KKYCBB GE bottom-mount refrigerator | GFSF6KKYCBB | |
| Model #GFSF6KKYBBB GE bottom-mount refrigerator | GFSF6KKYBBB | |
| Model #PFSF6PKXCBB GE bottom-mount refrigerator | PFSF6PKXCBB | |
| Model #PFSF6PKXCWW GE bottom-mount refrigerator | PFSF6PKXCWW |
Reviews
Exact part perfect fit
I replaced the water and ice chute assembly on my GE refrigerator. The most difficult part of the process was removing the control panel. To remove the control panel a small screw driver was inserted into the small hole on the right underside of the panel. The screw had to be inserted about half an inch to an inch and the I pushed to my right to release the lower tab. Once the lower tab is released all the other could be released. Take your time and be careful not to break any tabs. After the panel was removed there were four electrical connectors to disconnect and the water line had to be pulled out from the assembly. There were only two screws to remove and the assembly slid out easily. To reinstall do the reverse and the control panel snapped back in easily with a little pressure. Overall easy job.
Charlie728, Chesapeake, Va
Did you find this review helpful?
- Ease of Installation
- Very Easy
- Duration of Installation
- 30 minutes - 1 hour
