- Kenmore refrigerator water filters
- Whirlpool refrigerator water filters
- Samsung refrigerator water filters
- GE refrigerator water filters
- LG refrigerator water filters
- Frigidaire refrigerator water filters
- KitchenAid refrigerator water filters
- Maytag refrigerator water filters
- Kenmore Elite refrigerator water filters
- Estate refrigerator water filters
- GE Profile refrigerator water filters
- Amana refrigerator water filters
- Bosch refrigerator water filters
- Dacor refrigerator water filters
- Electrolux refrigerator water filters
CONFIRM THE PART FITS
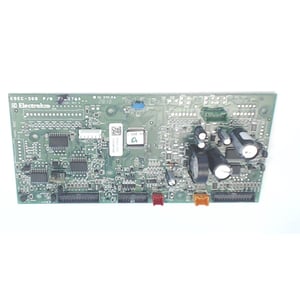
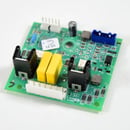
Range User Interface Control Board 316576452
Part #316576452
Online Only Price
$233.35 |
5% OFF Phone Price : $245.35
In Stock
For ZIP codes near Edit
This part fits
Part Information
This user interface control board (part number 316576452) is for ranges.
User interface control board 316576452 sends electronic signals to the burners when you select the cooking time or temperature.
Unplug the range or shut off the house circuit breaker to the range before installing this part.
Frequently Used Together
- $185.09 |6% OFF Phone Price : $197.09
- $29.91 |17% OFF Phone Price : $35.91
- $349.16 |$12.00 OFF Phone Price : $361.16
- $273.91 |$12.00 OFF Phone Price : $285.91
- $887.12 |19% OFF Was : $1098.23
- $1033.88 |6% OFF Was : $1096.73
- $261.71 |$12.00 OFF Phone Price : $273.71
Top models using the same part
| Model Name | Model Number | Diagram Name |
|---|---|---|
| Model #EW30IS6CJSA Electrolux electric range | EW30IS6CJSA | Control panel/induction unit |
| Model #EW30IS6CJSC Electrolux electric range | EW30IS6CJSC | Backguard |
| Model #EW30IS6CJSB Electrolux electric range | EW30IS6CJSB | Backguard/induction unit |
| Model #EW30IS65JSC Electrolux electric range | EW30IS65JSC | Backguard |
| Model #EW30IS65JSB Electrolux electric range | EW30IS65JSB | Control panel / induction unit |
| Model #EW30IS65JSA Electrolux electric range | EW30IS65JSA | Control panel/induction unit |
| Model #EW30IS65JSD Electrolux electric range | EW30IS65JSD | Backguard |
Reviews
Easy to install
Exactly what I needed, worked perfectly, thanks Sears for a quality product with prompt delivery and a great price.
Duke53, Chattanooga, TN
Did you find this review helpful?
- Ease of Installation
- Very Easy
- Duration of Installation
- 30 minutes - 1 hour
Yes, I would recommend this to a friend
Eliminates E-15 Electrolux Error
Older Electrolux induction ranges (ours is 10 years old) have a problem with E15 errors that shut down the entire stove top. After much web research, it appears the UIC is the problem. I replaced the UIC, and at least for one day there is no E15 error. Actual board replacement is simple; removing the panels to get to the board is not. I was amazed at the numbers of screws, some well hidden, that secure the front plastic panel. These screws can't be found until the range is pulled out from the wall, and the side oven panels are removed. Also, the original screws are very tight, and hard to remove without stripping the heads. I recommend using new Philipps screwdrivers of high quality; these should grab the heads securely. Total project time was 2 hours 15 minutes.
Adverseevent, Ambler, PA
Did you find this review helpful?
- Ease of Installation
- Moderate
- Duration of Installation
- 1 - 2 hours
Yes, I would recommend this to a friend
A little trick to install.
Pull out stove (I have the slide in induction range) Remove side panels. Two visible screws and then the hidden screws are slotted. The top hidden screw connection lifts up, the two bottom hidden screw connections slide forward. Once you remove the first two visible screws you can pull the side panel out far enough to look behind at the slotted screw configuration. The three colored connectors were easy to remove. Tabs are towards the back, push them in and pull connector out. Unscrew board. Three ribbon cables. There is a little slot where you can fit a tiny screwdriver so you can separate the cable from the connector. The two end cables have the slot toward the front of the stove, the middle cable has the slot towards the rear of the stove. To get to the middle cable, I took the board and flipped it up and over and set it on the control panel and then you can see that slot. In order to find out what slots I'm talking about, look at the new board you purchased and you'll see where they are located. This site won't let me back to the top of what I'm typing so I apologize for listing this last. FIRST STEP.. Take pictures.
Deb d, Undisclosed
4 people thought this review was helpful.
- Ease of Installation
- Moderate
- Duration of Installation
- 30 minutes - 1 hour
