- Kenmore refrigerator water filters
- Whirlpool refrigerator water filters
- Samsung refrigerator water filters
- GE refrigerator water filters
- LG refrigerator water filters
- Frigidaire refrigerator water filters
- KitchenAid refrigerator water filters
- Maytag refrigerator water filters
- Kenmore Elite refrigerator water filters
- Estate refrigerator water filters
- GE Profile refrigerator water filters
- Amana refrigerator water filters
- Bosch refrigerator water filters
- Dacor refrigerator water filters
- Electrolux refrigerator water filters
CONFIRM THE PART FITS
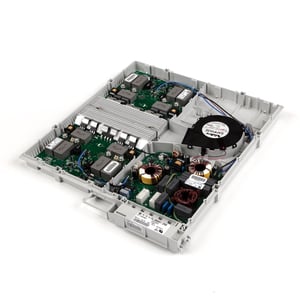
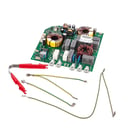
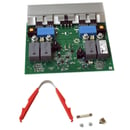
Range Induction Module Assembly 318329601
Part #318329601
Online Price
$1128.60 |
20% OFF Was : $1417.79
In Stock
For ZIP codes near Edit
Part Information
This induction module assembly (part number 318329601) is for ranges.
Induction module assembly 318329601 controls the induction element heating system. The assembly may include multiple parts; refer to your parts diagram for a complete list of parts included.
Shut off the house circuit breaker or unplug the range before installing this part.
Frequently Used Together
- $687.47 |12% OFF Was : $782.18
- $821.75 |$12.00 OFF Phone Price : $833.75
- $611.75
- $190.40 |6% OFF Phone Price : $202.40
- $375.24 |$12.00 OFF Phone Price : $387.24
Top models using the same part
| Model Name | Model Number | Diagram Name |
|---|---|---|
| Model #79042832800 Kenmore Elite electric cooktop | 79042832800 | Controls |
| Model #79042830800 Kenmore Elite electric cooktop | 79042830800 | Controls |
| Model #79042800502 Kenmore Elite electric cooktop | 79042800502 | Controls |
| Model #79042800500 Kenmore Elite electric cooktop | 79042800500 | Control panel |
| Model #79042800501 Kenmore Elite electric cooktop | 79042800501 | Control panel |
| Model #E30IC75FSS3 Electrolux electric cooktop | E30IC75FSS3 | Control panel |
| Model #E30IC75FSS4 Electrolux electric cooktop | E30IC75FSS4 | Control panel |
| Model #E30IC75FSS1 Electrolux electric cooktop | E30IC75FSS1 | Control panel |
| Model #E30IC75FSS5 Electrolux electric cooktop | E30IC75FSS5 | Control panel |
| Model #79042830801 Kenmore Elite electric cooktop | 79042830801 | Control panel |
Reviews
Range Induction Module Assembly
Kenmore Elite Range - our induction cooktop shorted out and popped the circuit breaker after 12 years of faithful use. I had a very difficult time finding any useful diagnostic information or tear down and assembly instructions. I finally found the error code descriptions, it had a code 21 and when I looked that up I determined that it was not the problem. I took the oven apart and discovered that there were several burned components in the modular assembly. They had them priced as individual components or you could buy the entire assembly for actually less. I ordered the entire assembly which was in stock, once I placed the order I received a notification it was backordered? Then the next day I received a tracking number stating it would arrive in 4 days, (I paid for expedited shipping). The package arrived open, fortunately, there was no damage. For the cost and intricacy of the item it should packaged a little better. Anyways, I installed it and the range cooktop is working as good as new. I will say out of all the induction cooktops I have looked at over the years this is by far a very well thought out, user friendly design and I am very happy the parts were still available for it! I would not recommend doing this job unless you have some skill with mechanical and electrical assembly and diagnostics. Take photos as you disassemble!


Rudedawg, Henderson, NV
Did you find this review helpful?
- Ease of Installation
- Moderate
- Duration of Installation
- 30 minutes - 1 hour
Yes, I would recommend this to a friend
Easy to install...but pay attention
The assembly is a one for one swap. There are minor differences on the board where the controls board plugs into it, so you will eant to note which of the 2 identical female connectors is your mark. When disconnecting and reconnecting the power leads, be sure to note the copper jumpers beneath the existing wires/screws and place them on the new board at the same locations...obviously. in a low light situation, these can be missed on the first try...as I did. No instructions accompany the board and I didn't find an example on the Sears website, so just take pictures at the various stages of disassemby to reference later. There are A LOT of screws holding the outer casing and the inner assembly together, so the majority of time spent is just getting the unit out of the countertop and getting into it and then reversing the process. Be sure to pay attention to the wire lead to the control board, when you go to remove the cover/cooking surface glass. Lift from the sides but tilt it toward you and keep the front with the controls as close together as possible until you can disconnect the lead. Apart from that, it's a straight forward swap.
Eazyrip, NJ
2 people thought this review was helpful.
- Ease of Installation
- Easy
- Duration of Installation
- 30 minutes - 1 hour
