- Kenmore refrigerator water filters
- Whirlpool refrigerator water filters
- Samsung refrigerator water filters
- GE refrigerator water filters
- LG refrigerator water filters
- Frigidaire refrigerator water filters
- KitchenAid refrigerator water filters
- Maytag refrigerator water filters
- Kenmore Elite refrigerator water filters
- Estate refrigerator water filters
- GE Profile refrigerator water filters
- Amana refrigerator water filters
- Bosch refrigerator water filters
- Dacor refrigerator water filters
- Electrolux refrigerator water filters
CONFIRM THE PART FITS
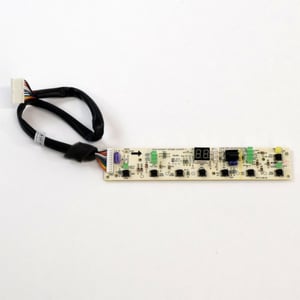
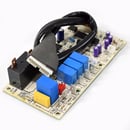
Room Air Conditioner Display Board (replaces 5304476357) 5304477181
Part #5304477181
Online Only Price
$92.80 |
6% OFF Phone Price : $98.80
In Stock
For ZIP codes near Edit
This part fits
Part Information
This display board (part number 5304477181) is for room air conditioners.
Display board 5304477181 displays the selections chosen for operation such as fan speed and operation mode.
Unplug the room air conditioner before installing this part. Wear work gloves to protect your hands.
Frequently Used Together
- $114.13 |10% OFF Phone Price : $126.13
- $100.76 |11% OFF Phone Price : $112.76
- $72.93
- $34.31
- $52.50
Top models using the same part
| Model Name | Model Number | Diagram Name |
|---|---|---|
| Model #FRA183MT210 Frigidaire room air conditioner | FRA183MT210 | |
| Model #FRA183MT212 Frigidaire room air conditioner | FRA183MT212 | |
| Model #FRA184MT212 Frigidaire room air conditioner | FRA184MT212 | |
| Model #LRA157MT10 Frigidaire room air conditioner | LRA157MT10 | |
| Model #CAE18ESRR410A13 Crosley room air conditioner | CAE18ESRR410A13 | |
| Model #CAE15ESRR410A11 Crosley room air conditioner | CAE15ESRR410A11 | |
| Model #FRA183MT211 Frigidaire room air conditioner | FRA183MT211 | |
| Model #CAE18ESRR410A10 Crosley room air conditioner | CAE18ESRR410A10 | |
| Model #LRA157MT11 Frigidaire room air conditioner | LRA157MT11 | |
| Model #CAE18ESRR410A11 Crosley room air conditioner | CAE18ESRR410A11 |
Reviews
Very simple!
This was a pretty simple installation. You take the front of the air conditioning unit off, which should be fairly simple. Then there is a covering over the display board that you have to remove. I believe that may have been held on with 3 screws. It's been a few weeks since I did it so I may be slightly off on the details. Once the cover is removed the display board is held on with 5 screws. Remove those screws and pull the display board out. Be sure to also disconnect the wiring connectors. Install the new display board. There are a few little holes in the display board that fit over little tiny pegs so make sure the holes are lined up with the pegs. Once it is in just put the 5 screws back in and of course connect the wiring, which is easy because it is just a matter of snapping together the two connectors. At this point I would test it to make sure it is working before you put everything back together. If it is working then put the covering back over the display board, screw in the 3 screws to hold it in place, and then put the front of the air conditioning unit back on. This is a job that most people could do even if they are not experienced with fixing things or familiar with tools, and you don't have to have any experience in fixing air conditioners. If you can get the front of the air conditioner off and you can use a screwdriver you should be able to do this job. If you are unfamiliar with disconnecting wiring connectors that can sometimes be a challenge. It's just a matter of pulling two things apart but sometimes there is a tab or something that keeps them locked together and you just have to find how to release that tab. I don't remember for sure but I think this one was fairly simple to disconnect. It's a very simple job and I wanted to write this review primarily for people who aren't particularly adept at working on things to let you know that the steps to install the display board are relatively simple. I would say it takes 15-20 minutes to get this installed if you aren't experienced, maybe a little more. An experienced person could probably do it in 10 minutes or less.
DIY D D, Hartville, OH
Did you find this review helpful?
- Ease of Installation
- Very Easy
- Duration of Installation
- Less than 30 minutes
EASY TO ORDER - FAST SHIPPING
THE PART WAS EASY TO ORDER. THE SHIPPING WAS VERY FAST. THE PACKAGING WAS GREAT. HOWEVER, I DID NOT INSTALL THE CONTROL DISPLAY PANEL AS OF YET --- SO, I DO NOT KNOW IF IT WORKS, --- THE RESULTS ARE TO BE DETERMINED --- TO BE CONTINUED.
LYNNE3629, EPHRATA, PA. 17522
Did you find this review helpful?
- Ease of Installation
- Moderate
- Duration of Installation
- 30 minutes - 1 hour
